
THE near DEATH AND RE BIRTH
OF A
1979 HUNTER 37 CHERUBINI CUTTER
HUNTER 37 CUTTER
Galley
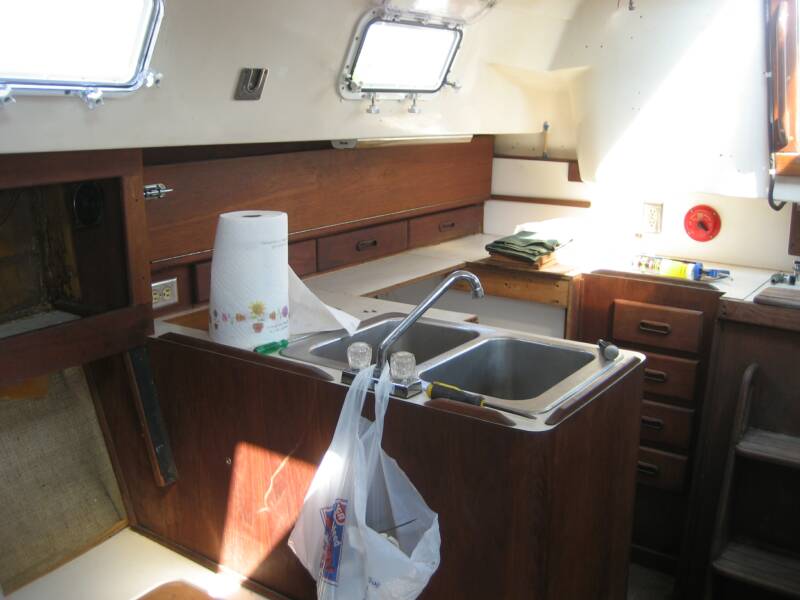
Original galley.
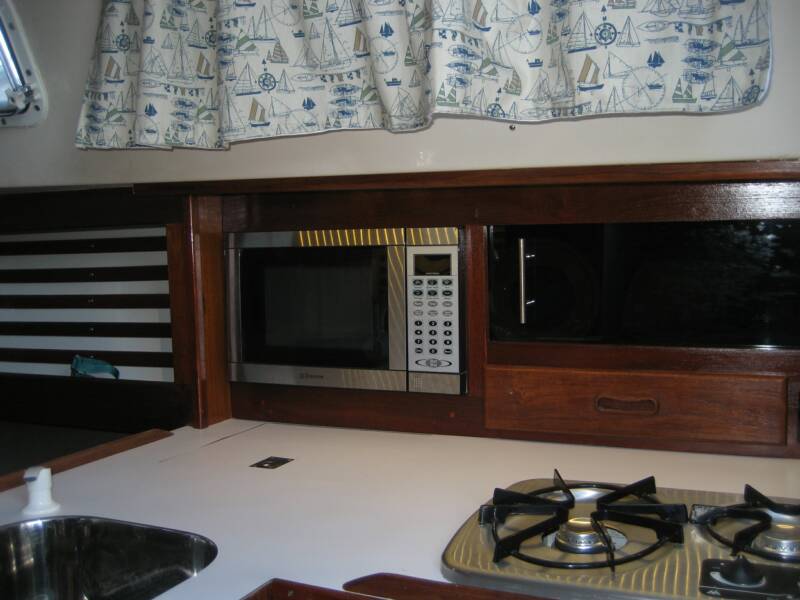
One large flip down shelf that covered the storage area. Three drawers and one outlet. My main goal was to incorporate a Microwave oven into the cabinet.
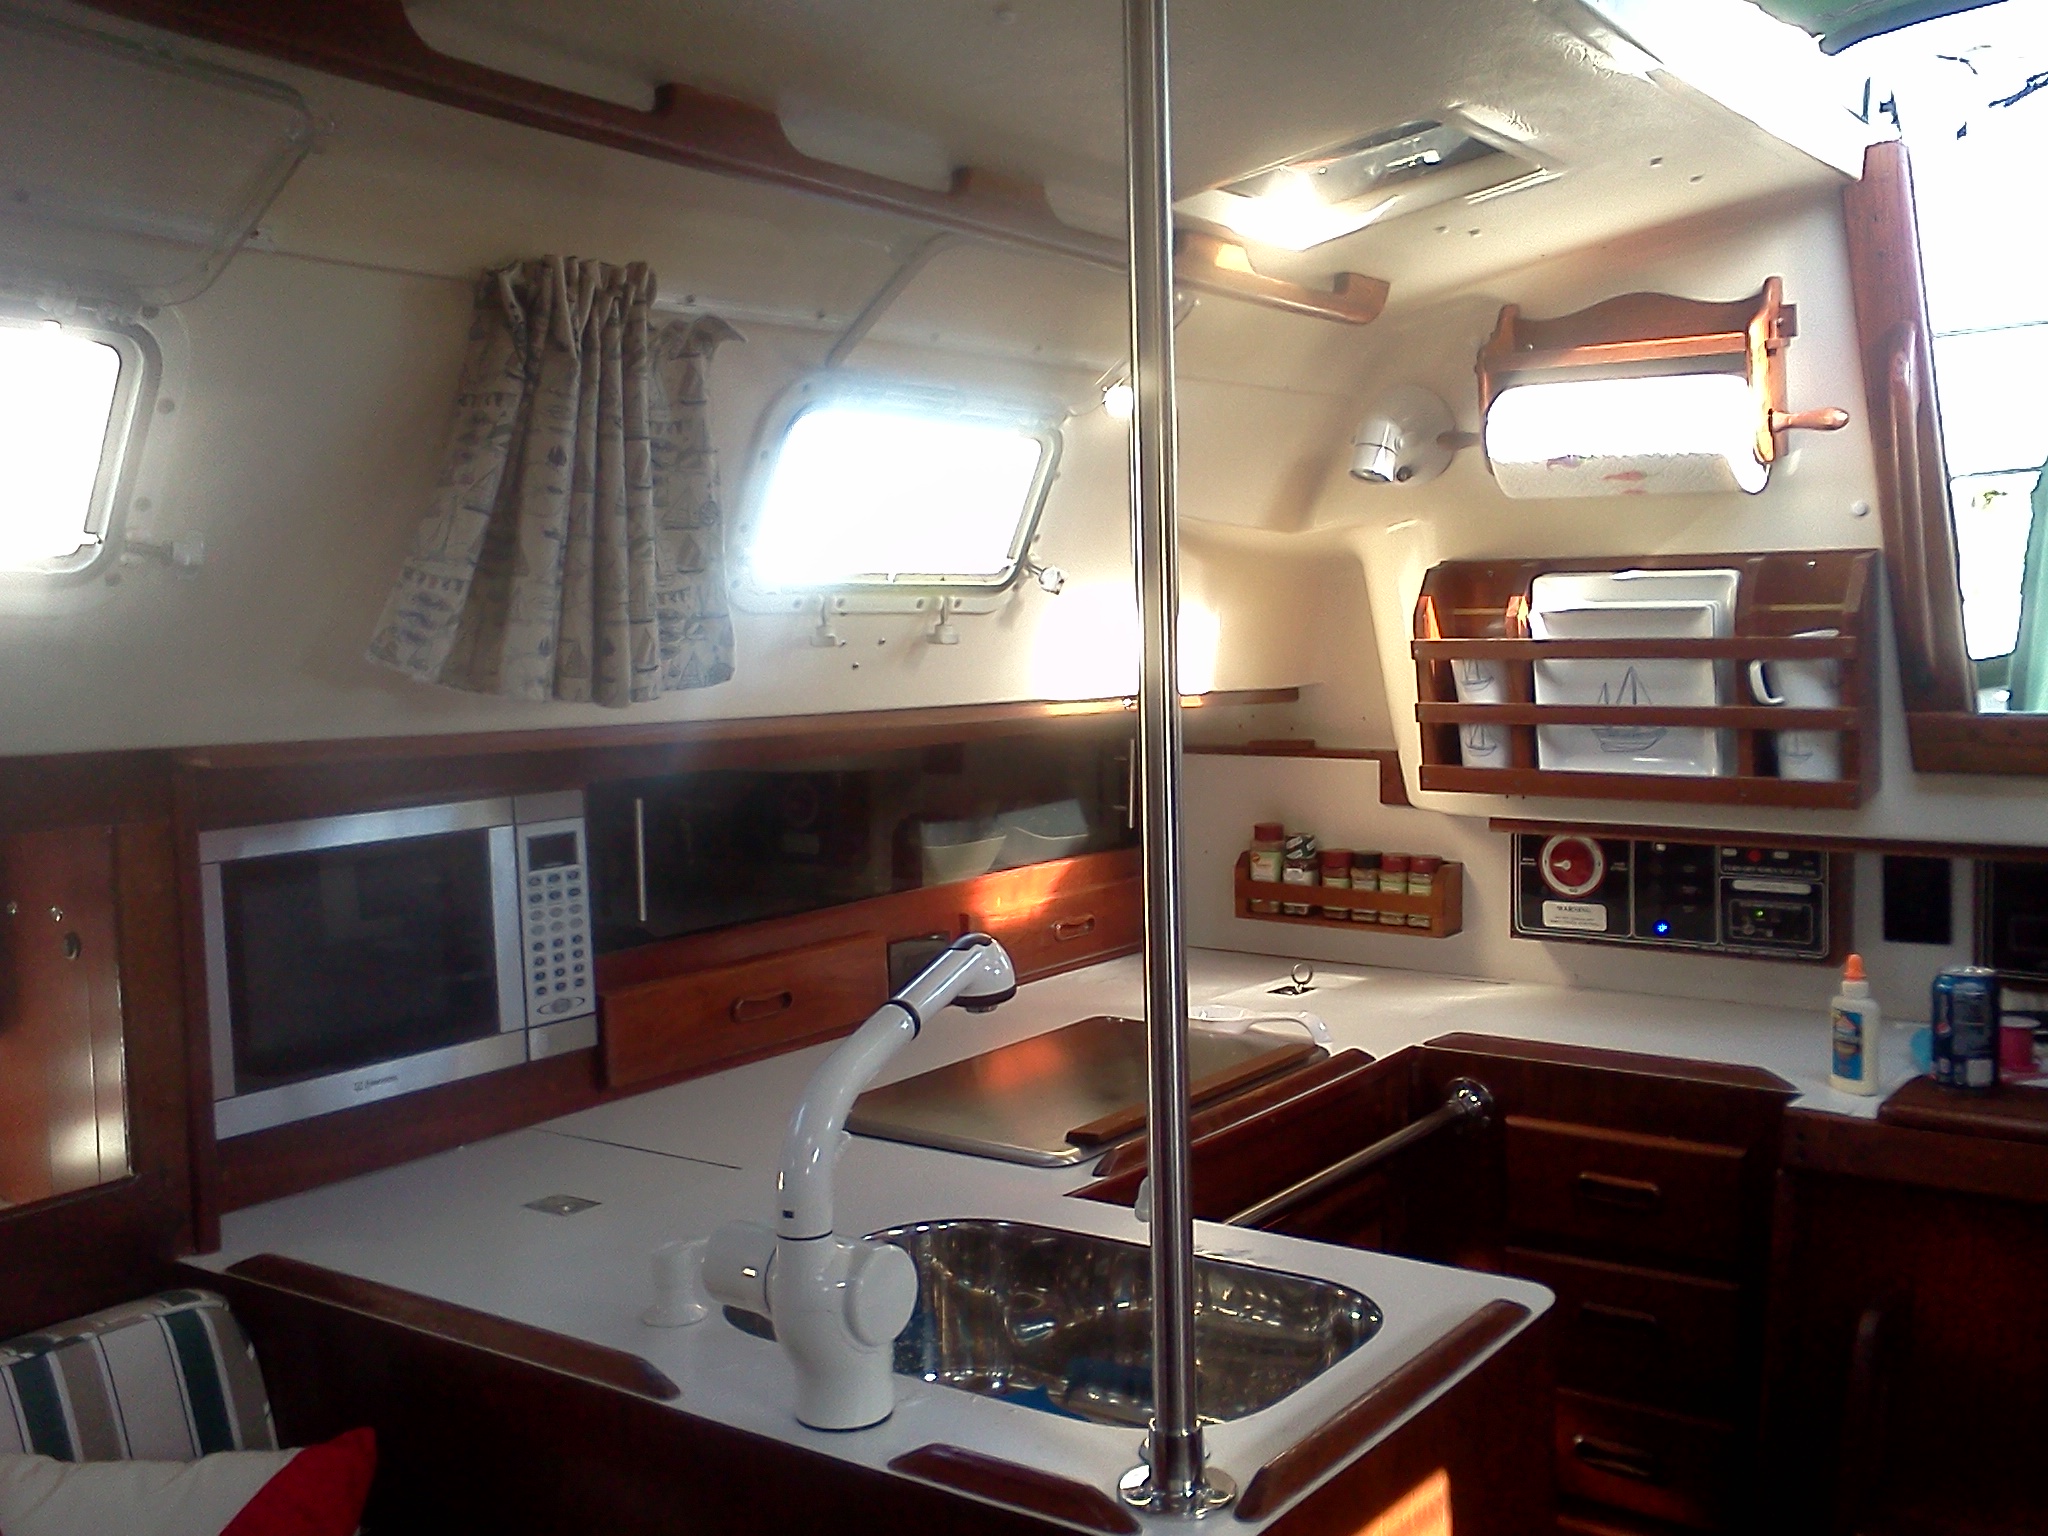
New Layout:
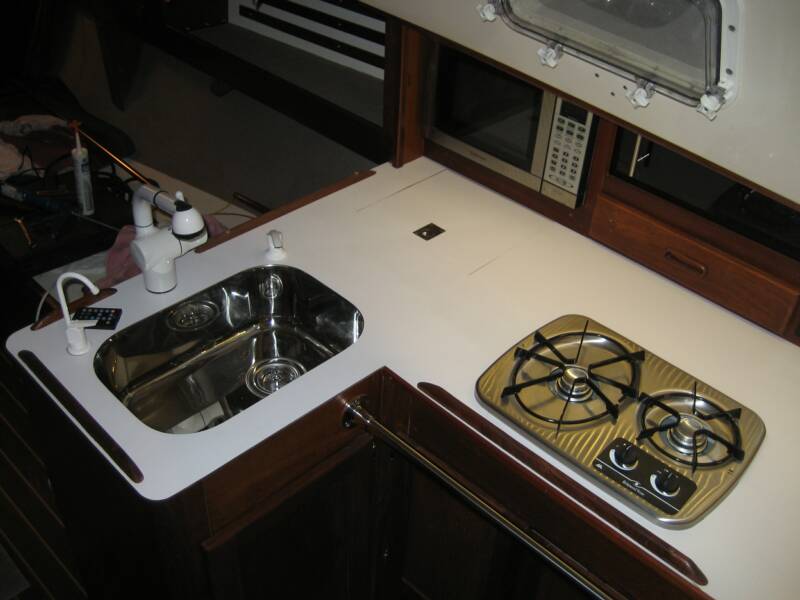
The new layout is more accessible. the microwave is handy and the sliders allow much easier access to the dishes and glassware. I purchased this stove top but later on came accross a marine Canyon stove top with stainless cover and installed it in its place.


Decided that an electric stove with oven was not for me. I needed to cook underway and on the hook. New stove was pulled out and sold. I decided I could use all that storage I had found. Cleaned the space, lined it in white Formica for the clean look. Added a shelf and ordered a set of teak doors. Teak doors did not come close to matching the 30 year old existing teak. tried several stains and found the Cabot's Australian Timber oil in mahogany was a perfect match.
After removing the cabinet, I noticed that all the joints were loose. 30 years of moisture had eaten all the glue at the joints. That made it easy to take apart. I decided to loose the shallowest drawer as it was useless and gain a microwave oven. After much measuring, I was able to shoe horn it. Works great. Plenty of clean storage since it is all lined in Formica. Smelly wall carpet is gone
Installing the sink:
I always liked the undemount sinks, however granite counter slab top would be 1.5 inches thick. looked at Corian, LG, Gibraltar, etc. Also about 1/2" thick. Since I did not have the room, I had to stay with Laminate. After much research, I found that several shops were installing undermounts in laminate counter tops. The trick is to recess the sink lip into the plywood substate, lots of epoxy and a special router bit at 8degrees to route the laminate edge without gouging the stainless sink.


After prepping the counter tops, We did a quick layout on the laminate sheet since we could not get it into the companionway in one large piece. After cutting it down to size, we applied the contact cement and took a beer brake. Afetr 20 minutes all was dry and we slowly dropped the laminate onto the counter top using dowels as spacers. all went well and we were able to rout the openings that after noon. Sink looks great. I installed the LP stove I had purchased but decided later on to replace it with a new Canyon LP stove top with stainless lid.


")
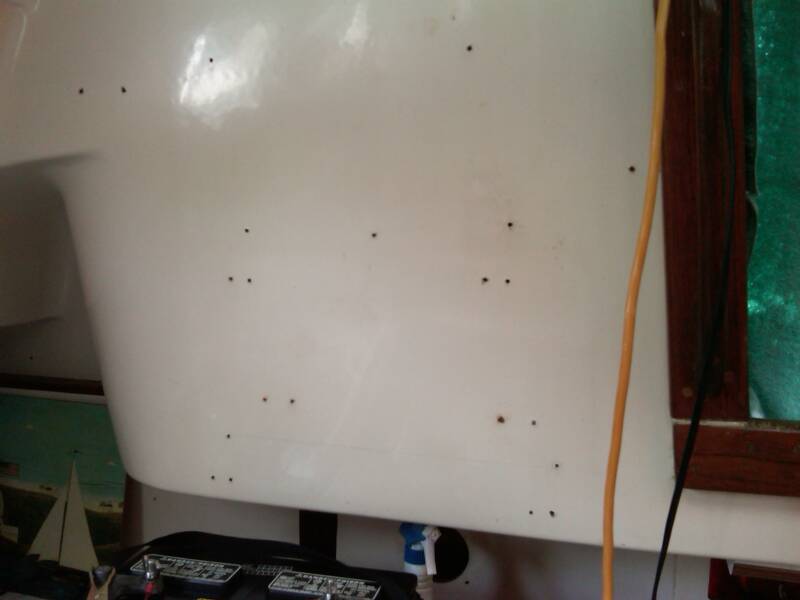
There are 27 screw holes on this galley bulkhead. I guess it is a popular place to install kitchen items. I made a double wide dish rack in order to cover as many screw holes as possible and also store my dishes.


The interior of the cooler area was old and rusty looking. After cleaning it I spayed the interior with new epoxy paint. Secured the thermostat and made a tray for the storage of food. I also have a remote sensing thermostat showing the temperature inside the box.
The ADLER BARBOUR unit is located in the starboard locker. I starts up and works properly. It is fairly old but still works. After 12 hours, the evaporator is 2/3 covered with frost. I will keep it as long as it runs. I have looked for a good used one but to date have not found anything worth buying. I guess I will bite the bullet and after this summer if the unit does not really keeps up with my need, I will replace it with a new one.


This is the new Kenyon stove I purchased to replace the new cooktop I had installed. This unit has a cover and allows for more counter space.


