


THE near DEATH AND RE BIRTH
OF A
1979 HUNTER 37 CHERUBINI CUTTER
HUNTER 37 CUTTER
Woodworking
Eyebrows:
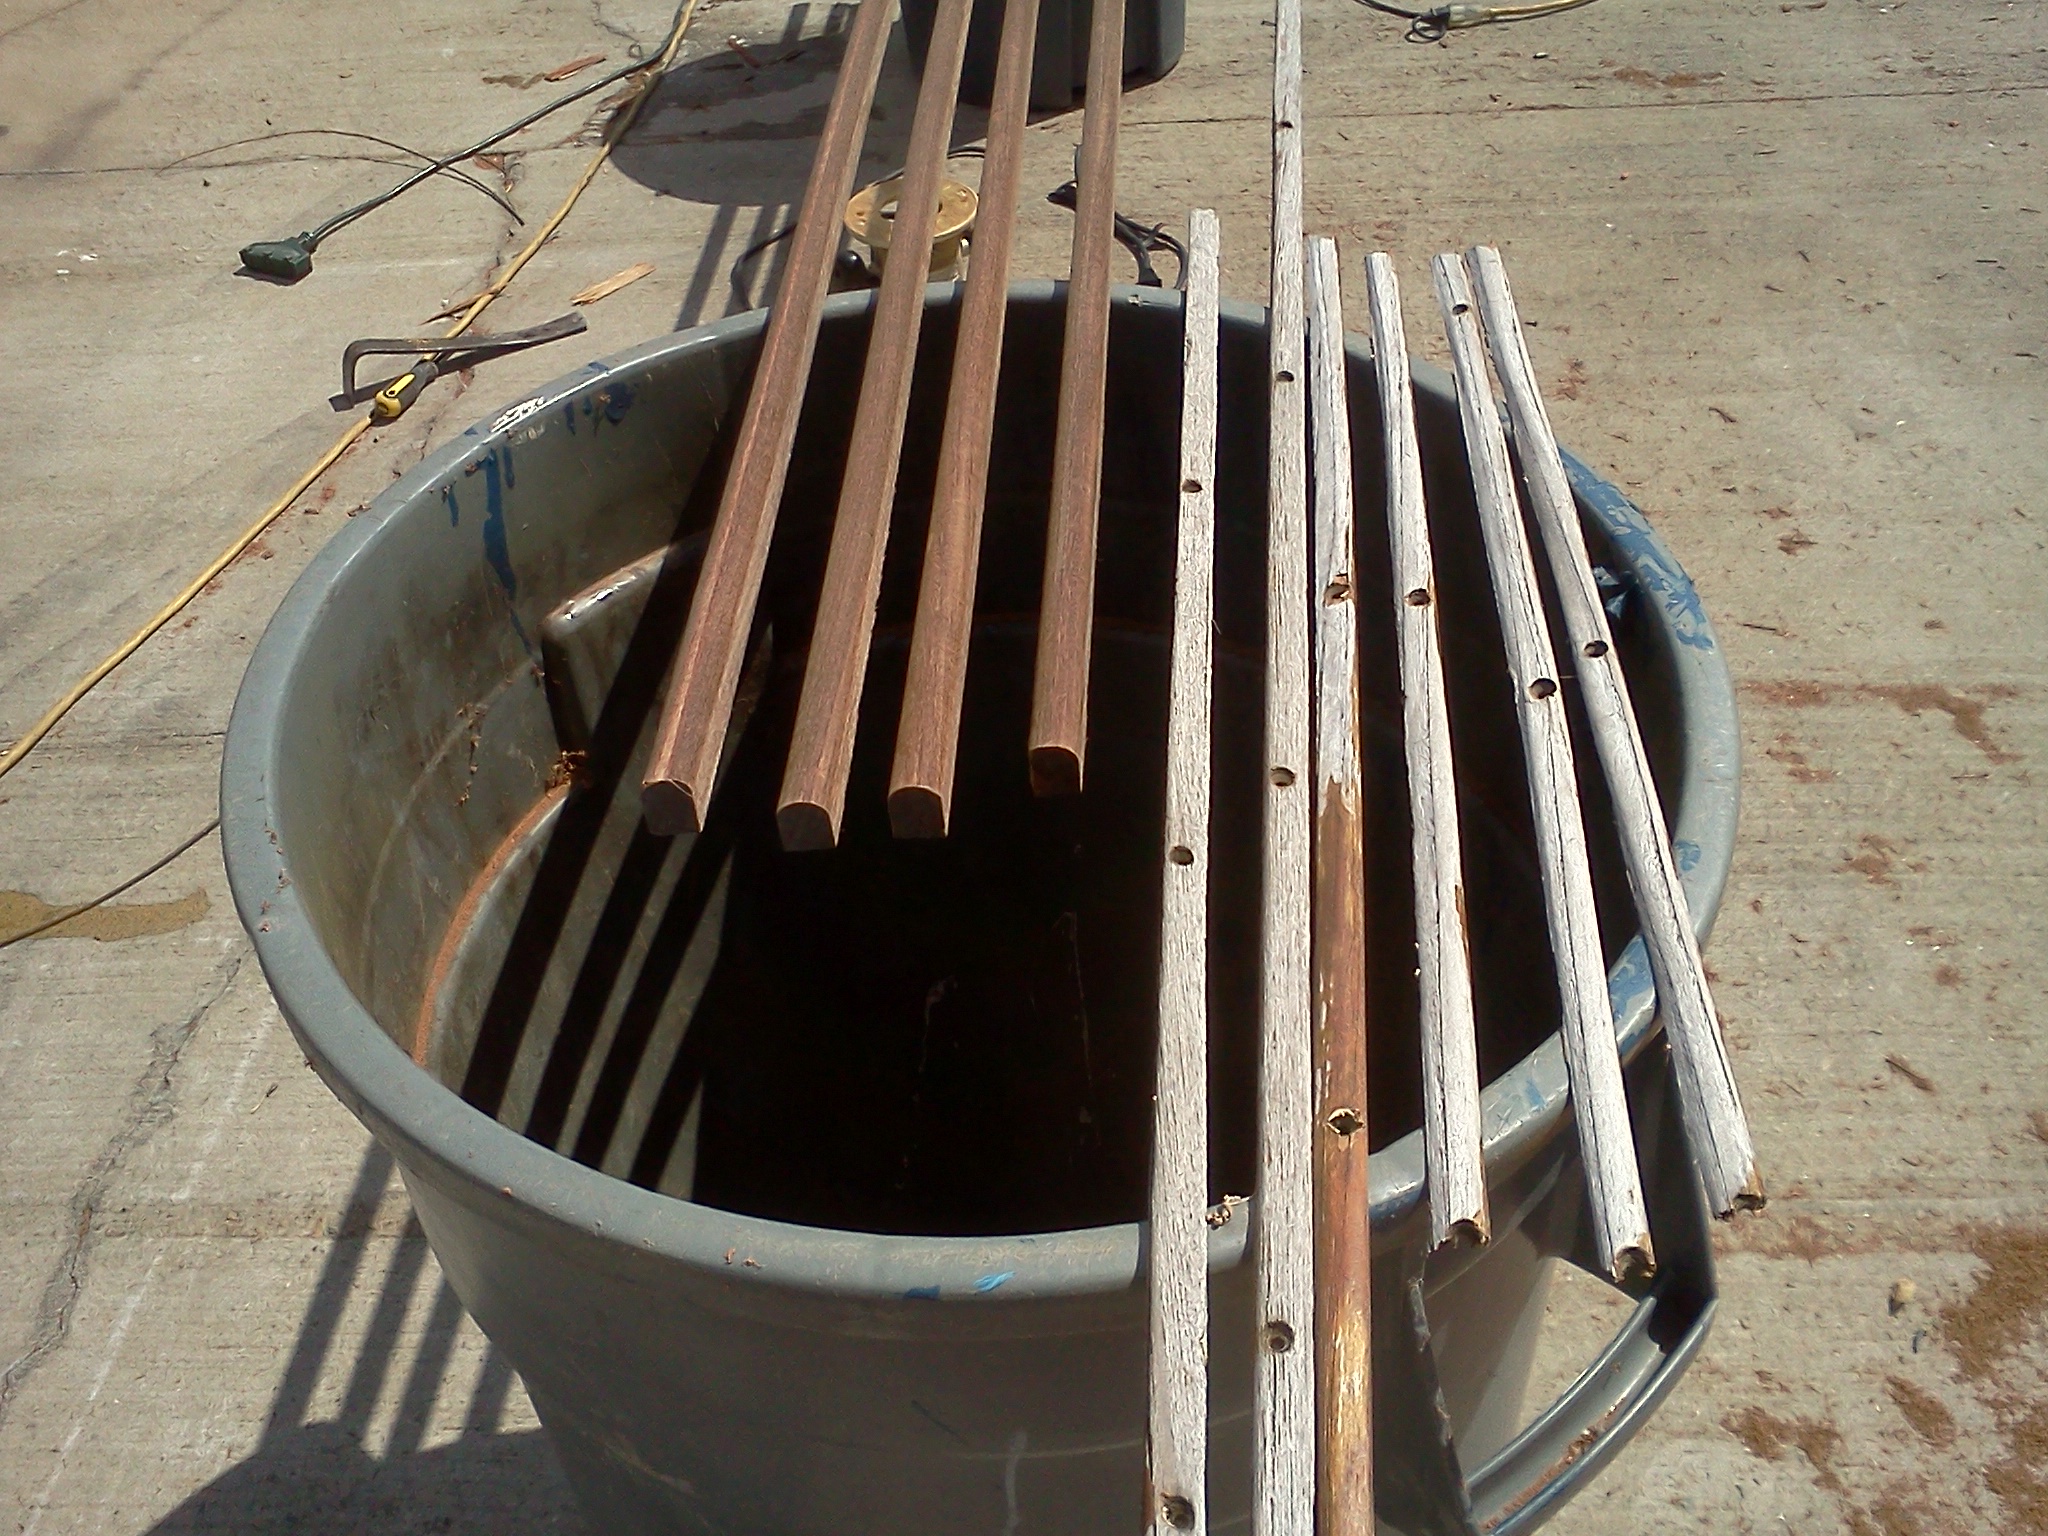
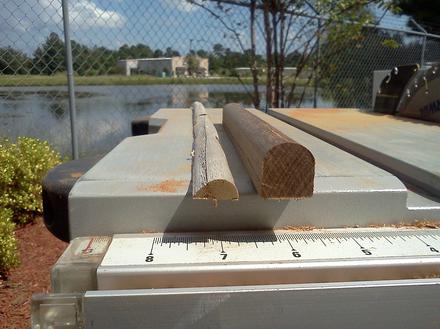
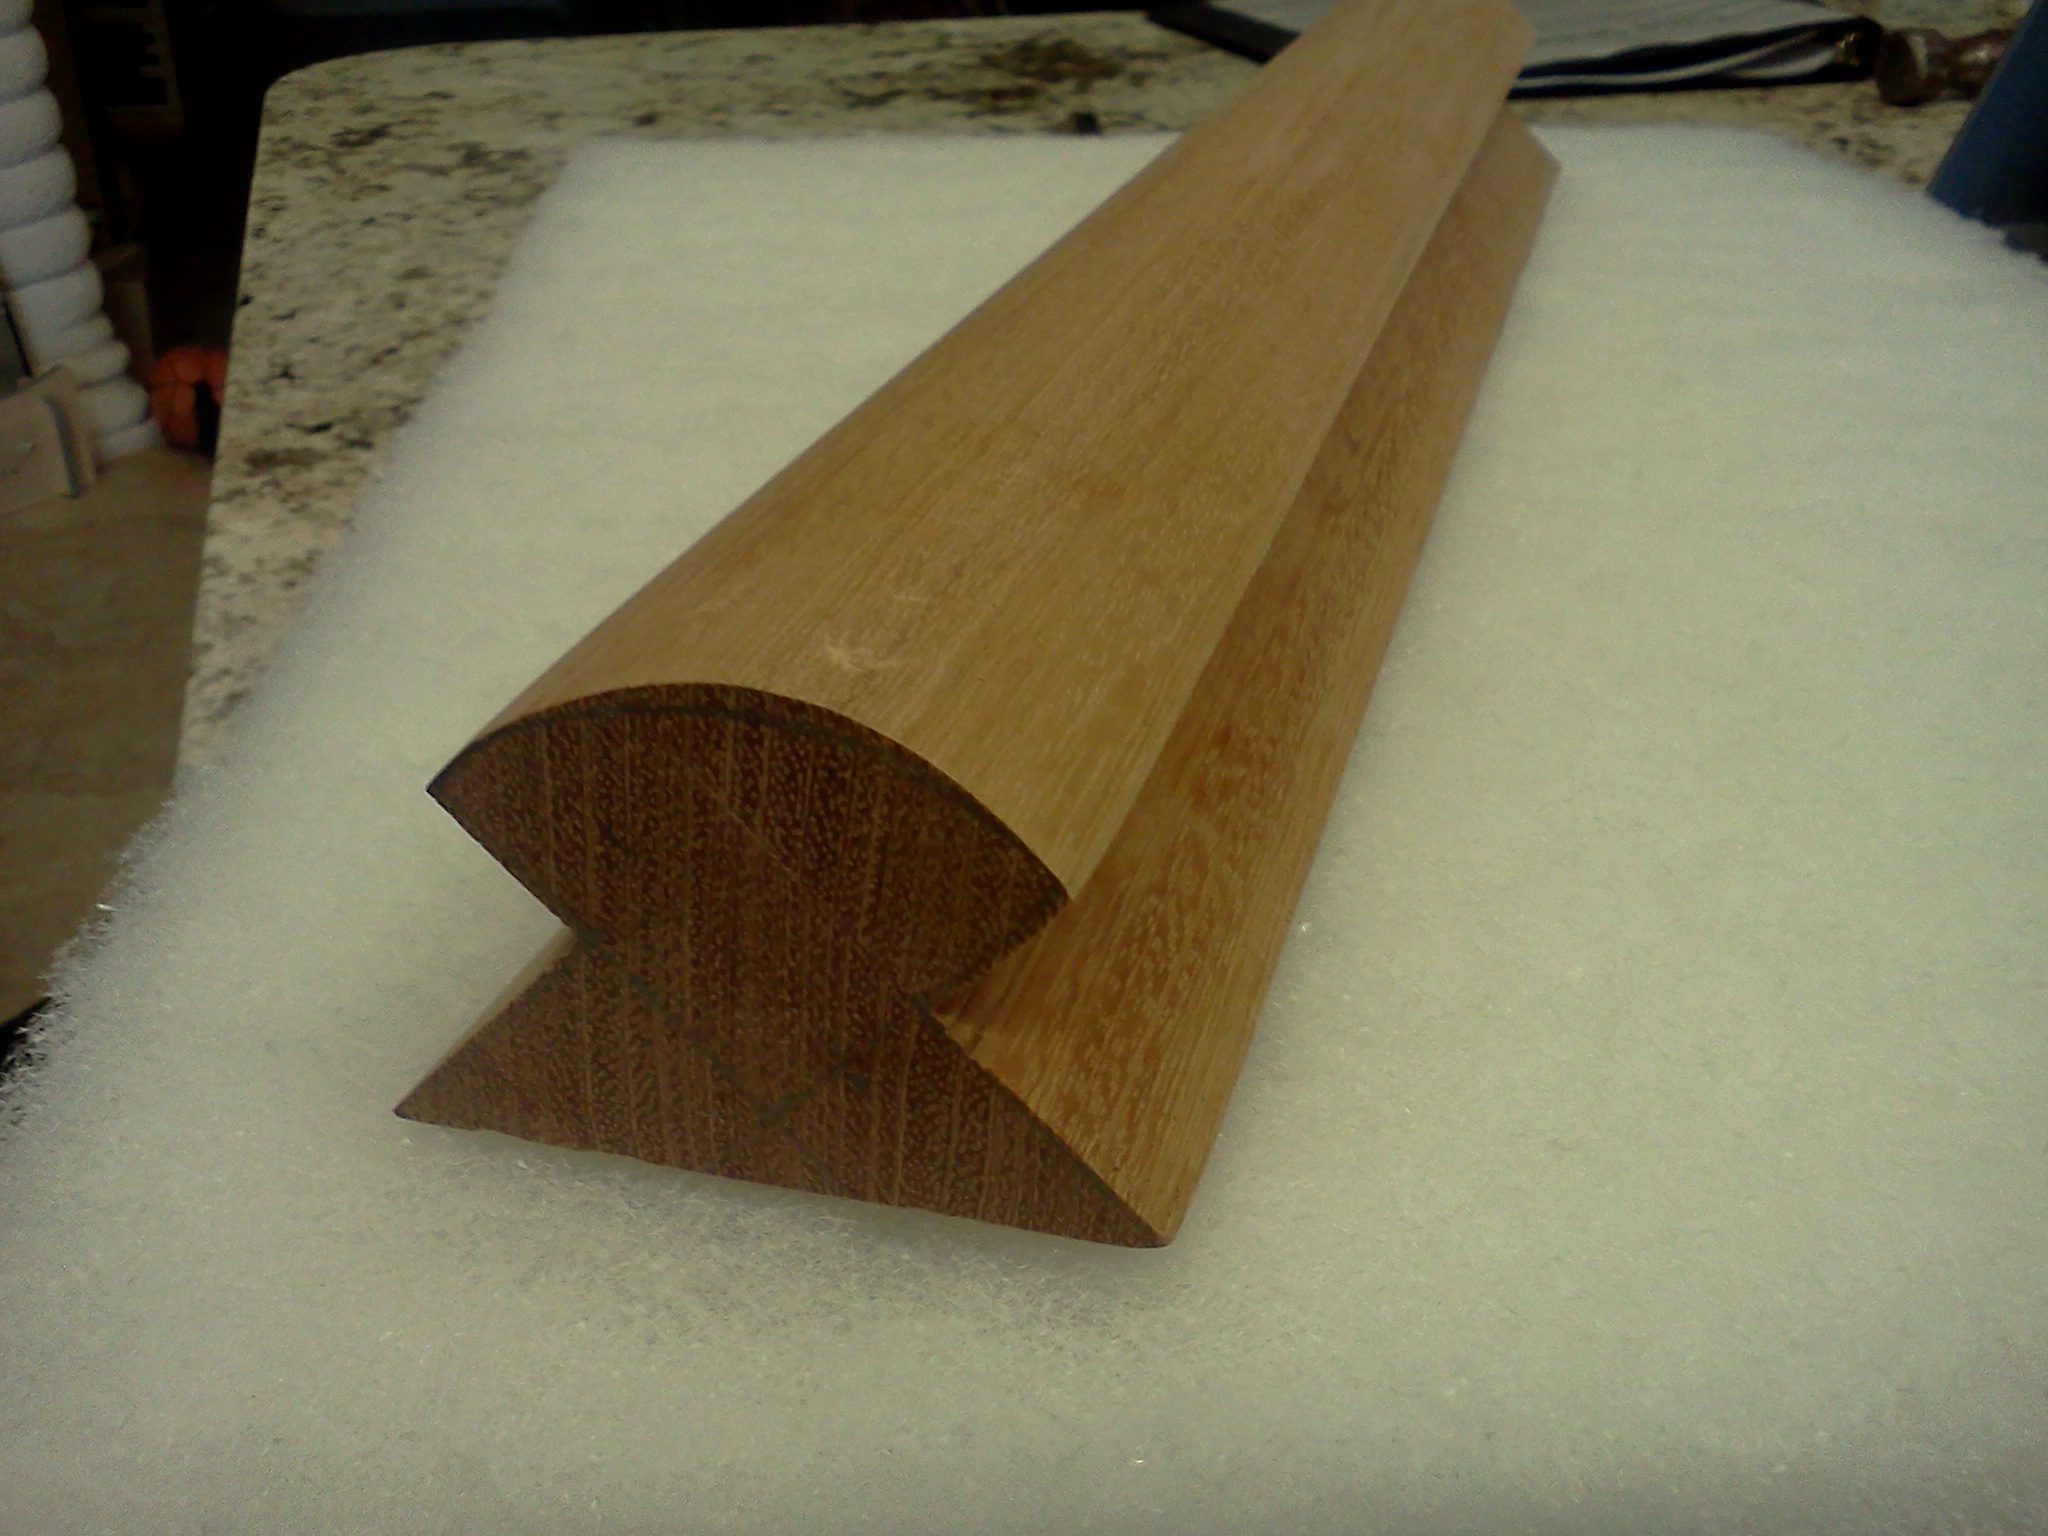
That thin piece of teak that runs along the top of the cabin is called an eyebrow. Does not look like much but once removed, you see the boat looks better with it. The problem was that it was so thin that the screw plugs had long ago disappeared. Holes were filled with putty since the plug hole was so shallow. I decided to make more substantial eyebrows. The problem was that there is about 20 linear feet of it on each side and the longest teak or mahogany I had was about 6ft. The original eyebrow was in two pieces of about 10ft each and 3/8" thick only.
Since I had just finished installing a IPE (Brazilian Walnut) deck on a remodeling job I did on a beach house in Garden City, S.C. I had 4 boards 1x6x12 left over. Perfect for the job. IPE is used in the amazon to make a lot of floating decks since it is very dense and will not rot easily. Furthermore, once weathered, it turns silver, just like teak does.
I started by ripping 1x1 strips and later on, eased a half round with the router. Pre drilled holes every 8" since the original holes were from 7 to 12" apart. Plugged all the old holes on the cabin top with thickened epoxy and pre drilled new holes.
The final eyebrow is about 3/4 x 3/4" . It looks substantial and has enough meat for the plugs I made from IPE to be glued with Gorilla Glue. Will never pop out.
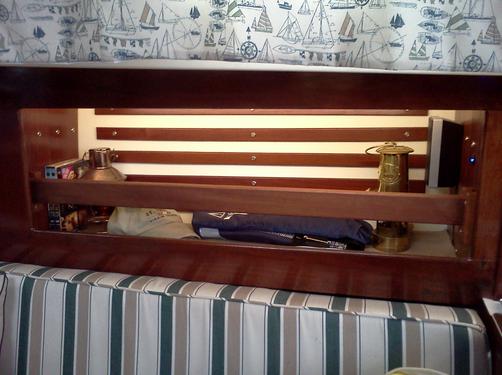
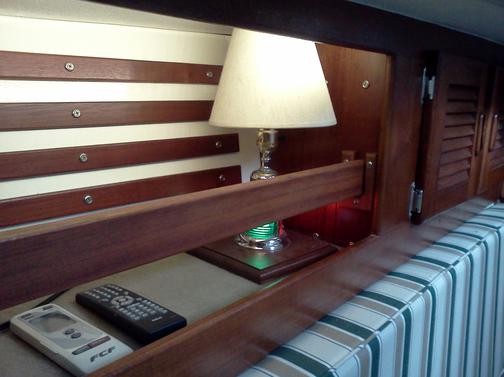
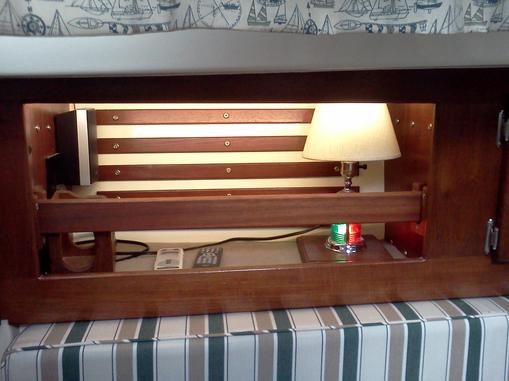
BOOKCASE RAILS
EYEBROWS
This project is the result of having pretty much finished all the major entries on my list and almost been bored.
Was a rainy Saturday, looking at sail boat pictures, I realized that after loading the bookcases with books, speakers and assorted crap, I would be picking it all from the floor the first time I tacked. So I decided to make some sort of removable rails that would allow me to corral all the crap in the bookshelves while at sea.
After much research (google images) of boat shelves. I decided on making two wall brackets that would anchor a bar across the opening.
Found some left over Royal Mahogany flooring at the shop and picked out several 6ft board with nice grain. Removed the tongs and grooves and planed the relief curfs of the back. Ended up with boards 5/8 thick and 3' wide. Perfect for my needs.
I made four brackets and two rails. Pre drilled the brackets and countersunk the screw holes so the screws would be flush with the wood. Eased all the edges with a roundover bit and sanded the whole thing. One coat of Cabot's Australian
oil in Mahogany Flame gave it that rich color. 4 coats of Poly.
old eyebrow was so old and damaged that it broke in many pieces as I removed it
Improvised workbench
Removed the lamp base and made a wider base for my lamp so it would not flip while at sea
FLASHLIGHT HOLDER
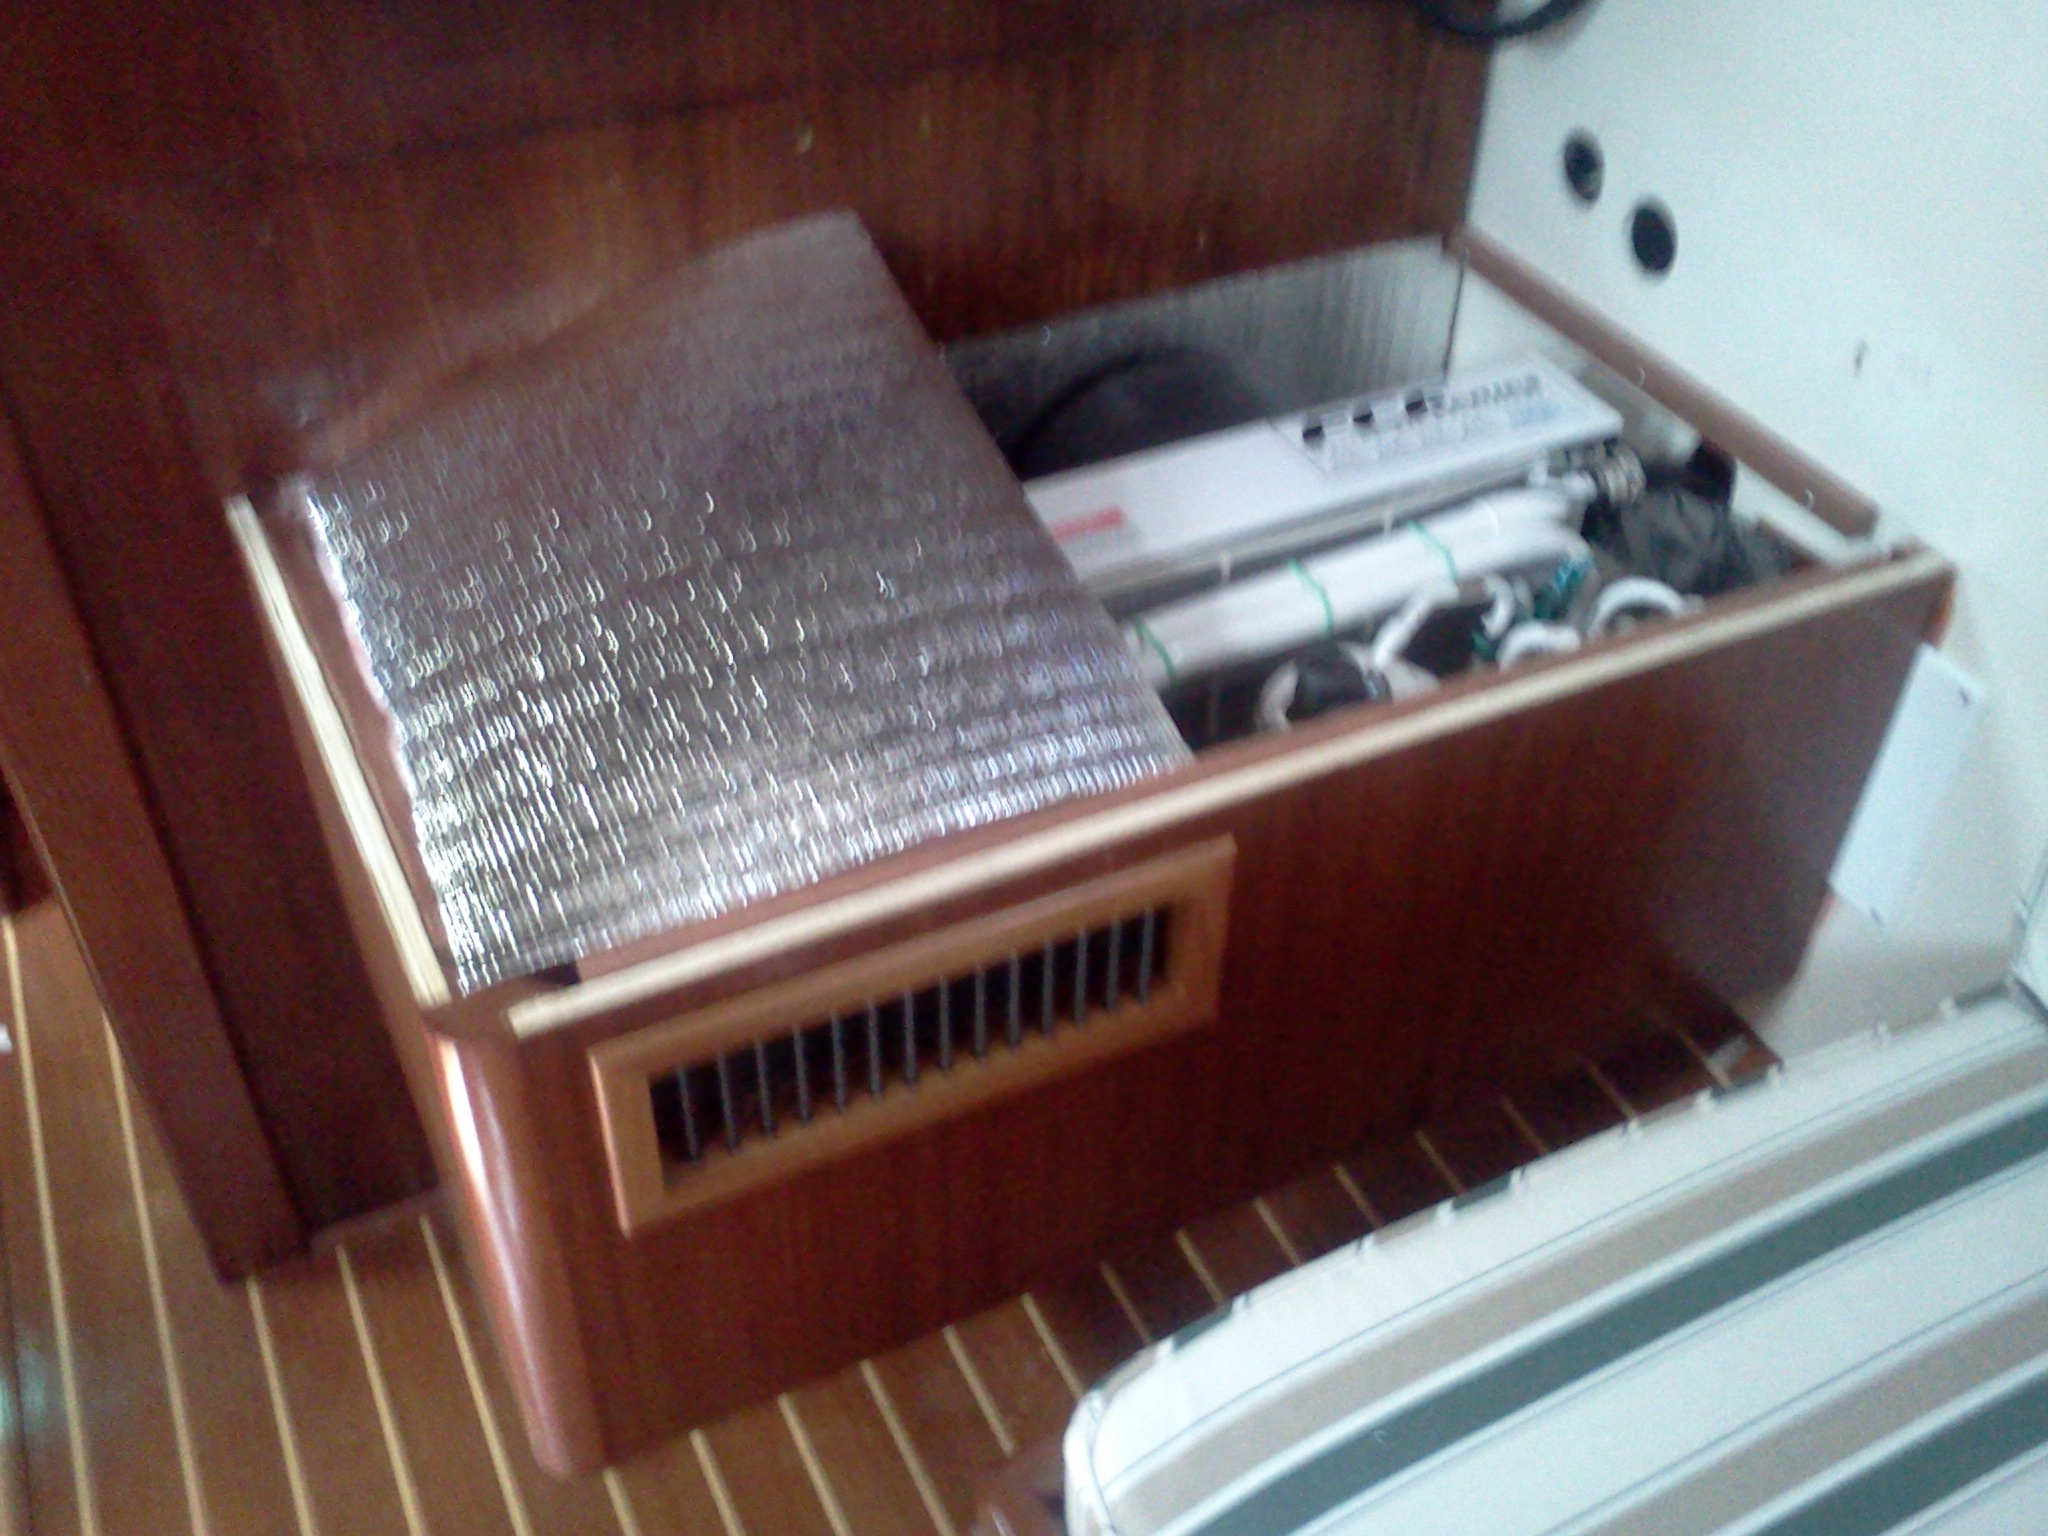
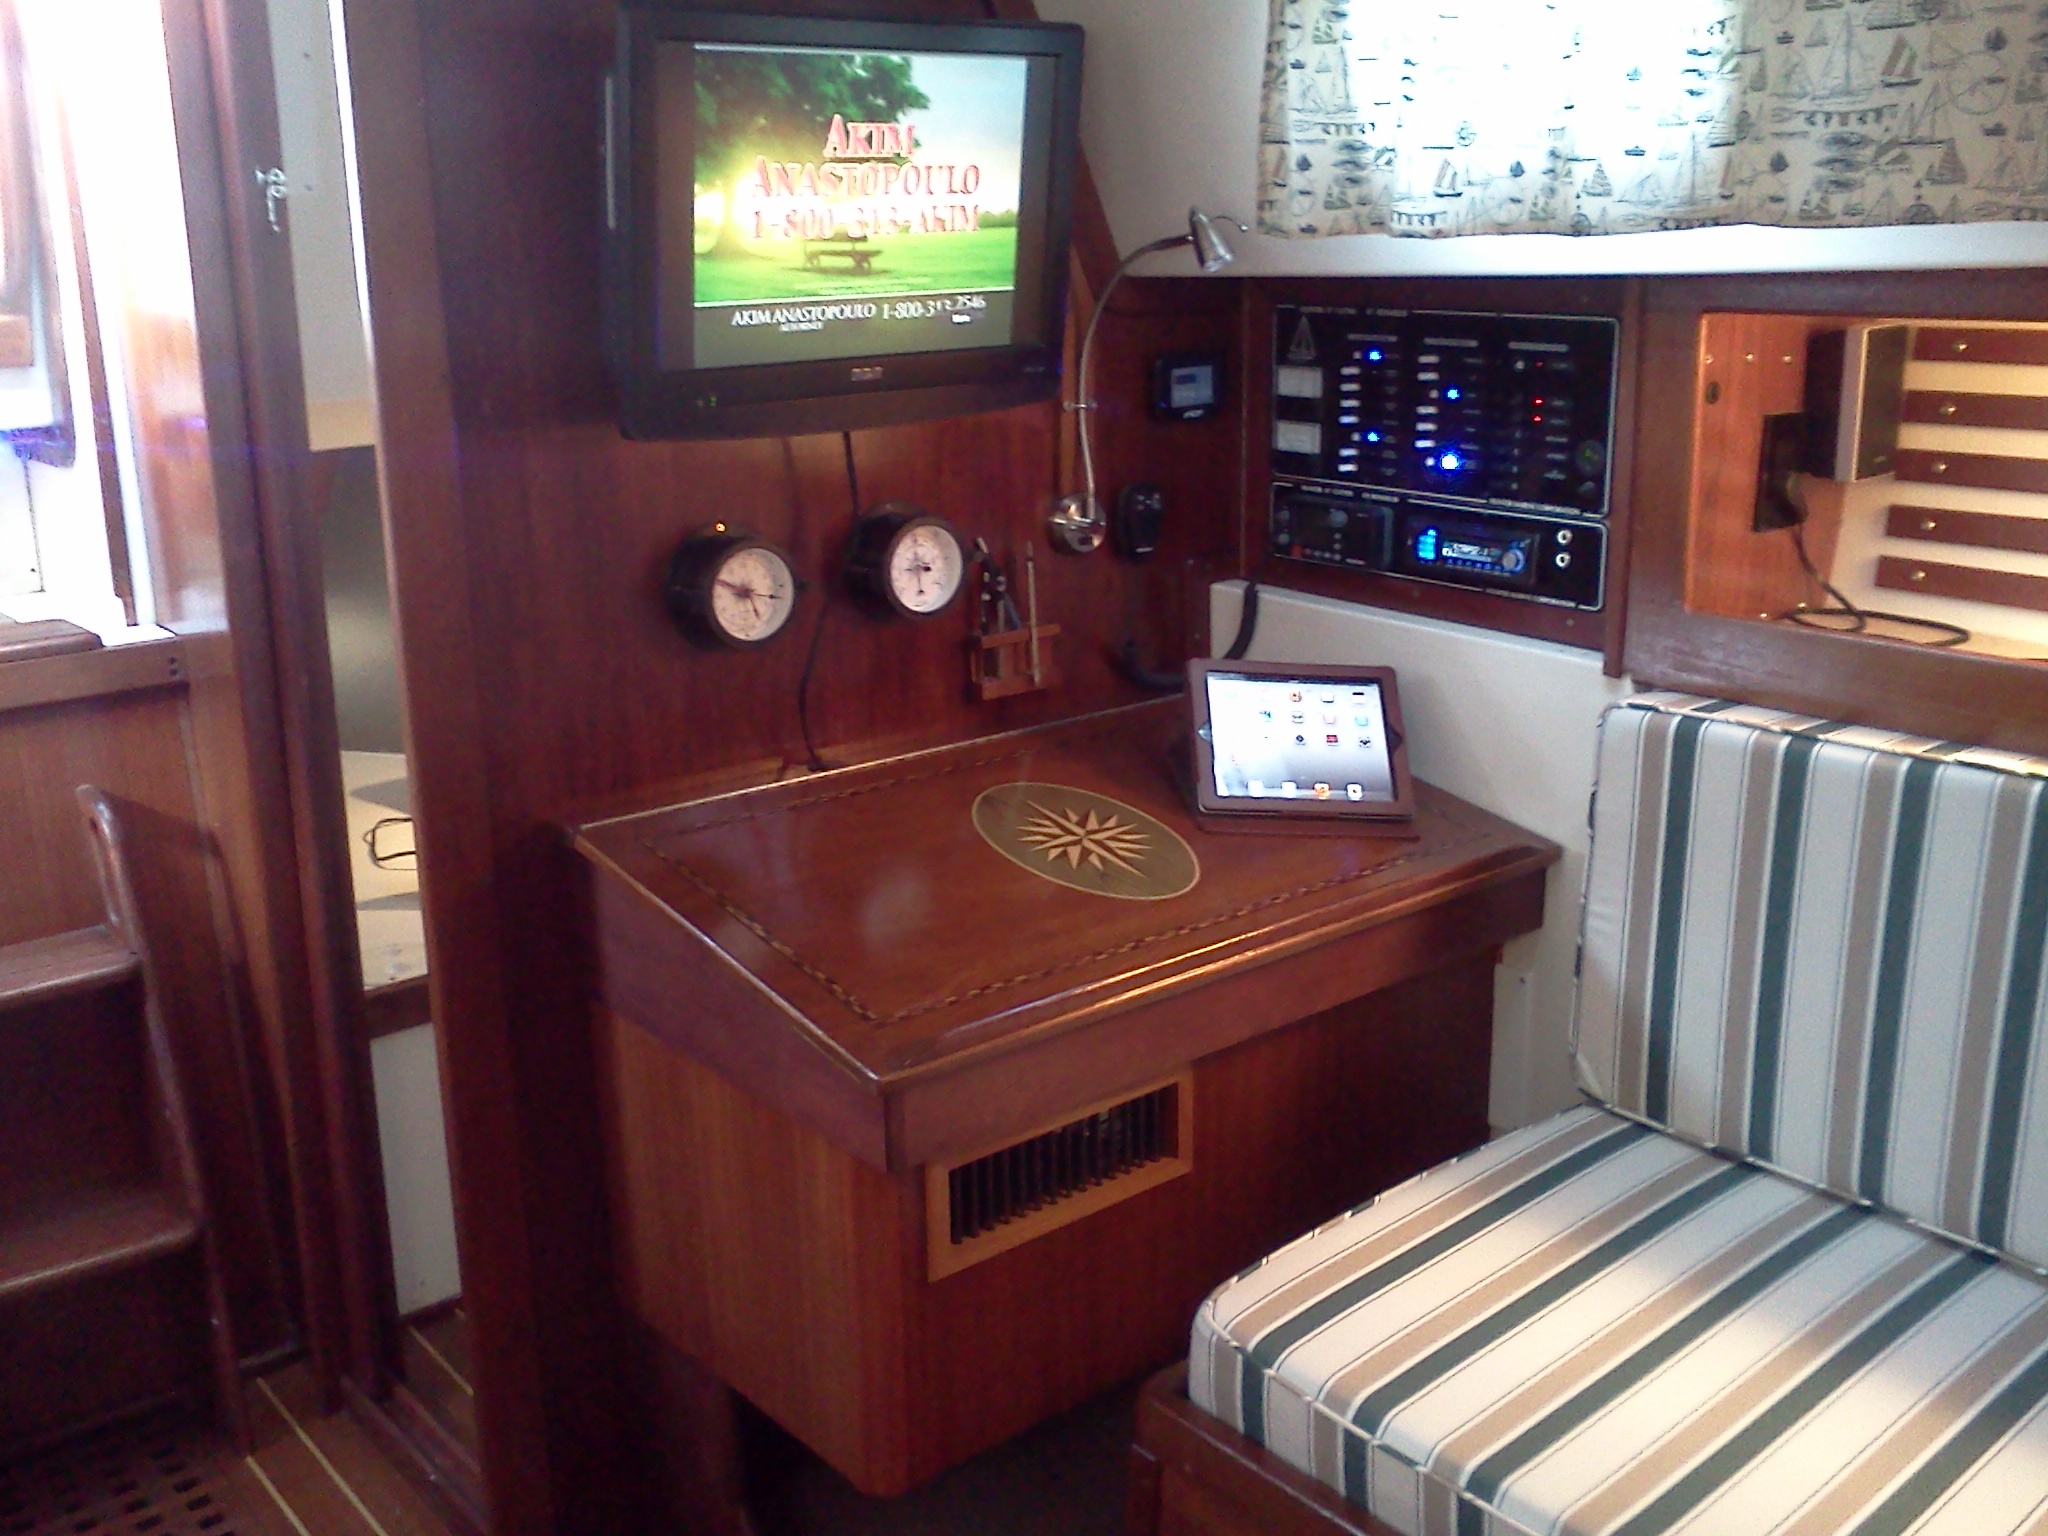
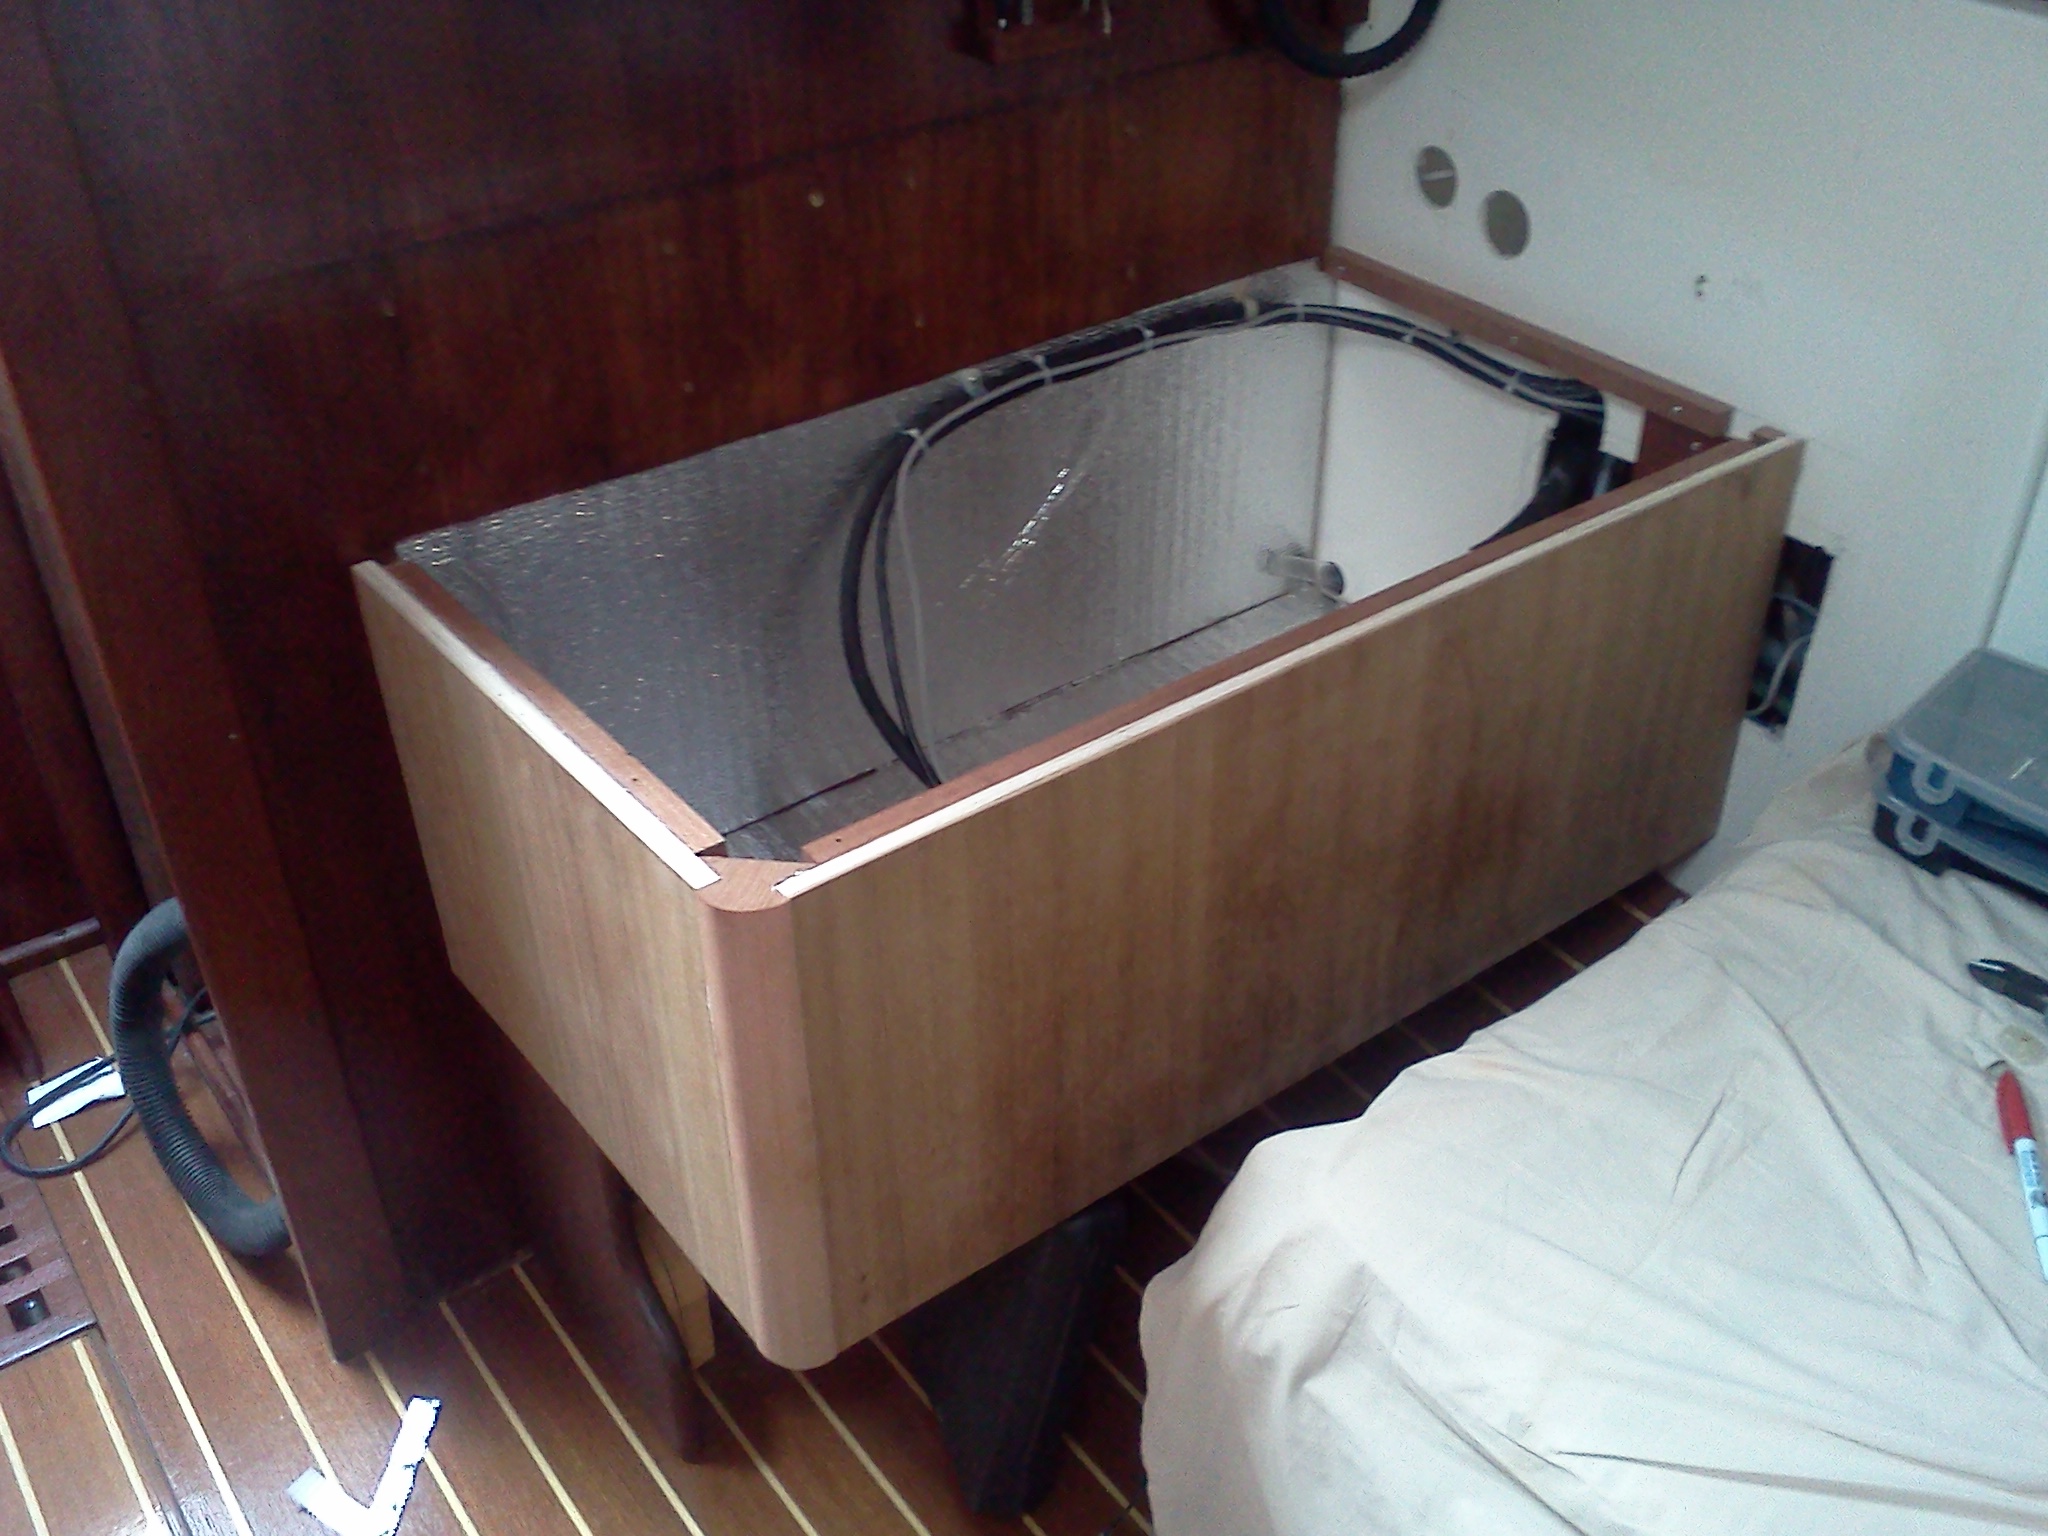
A/C CABINET

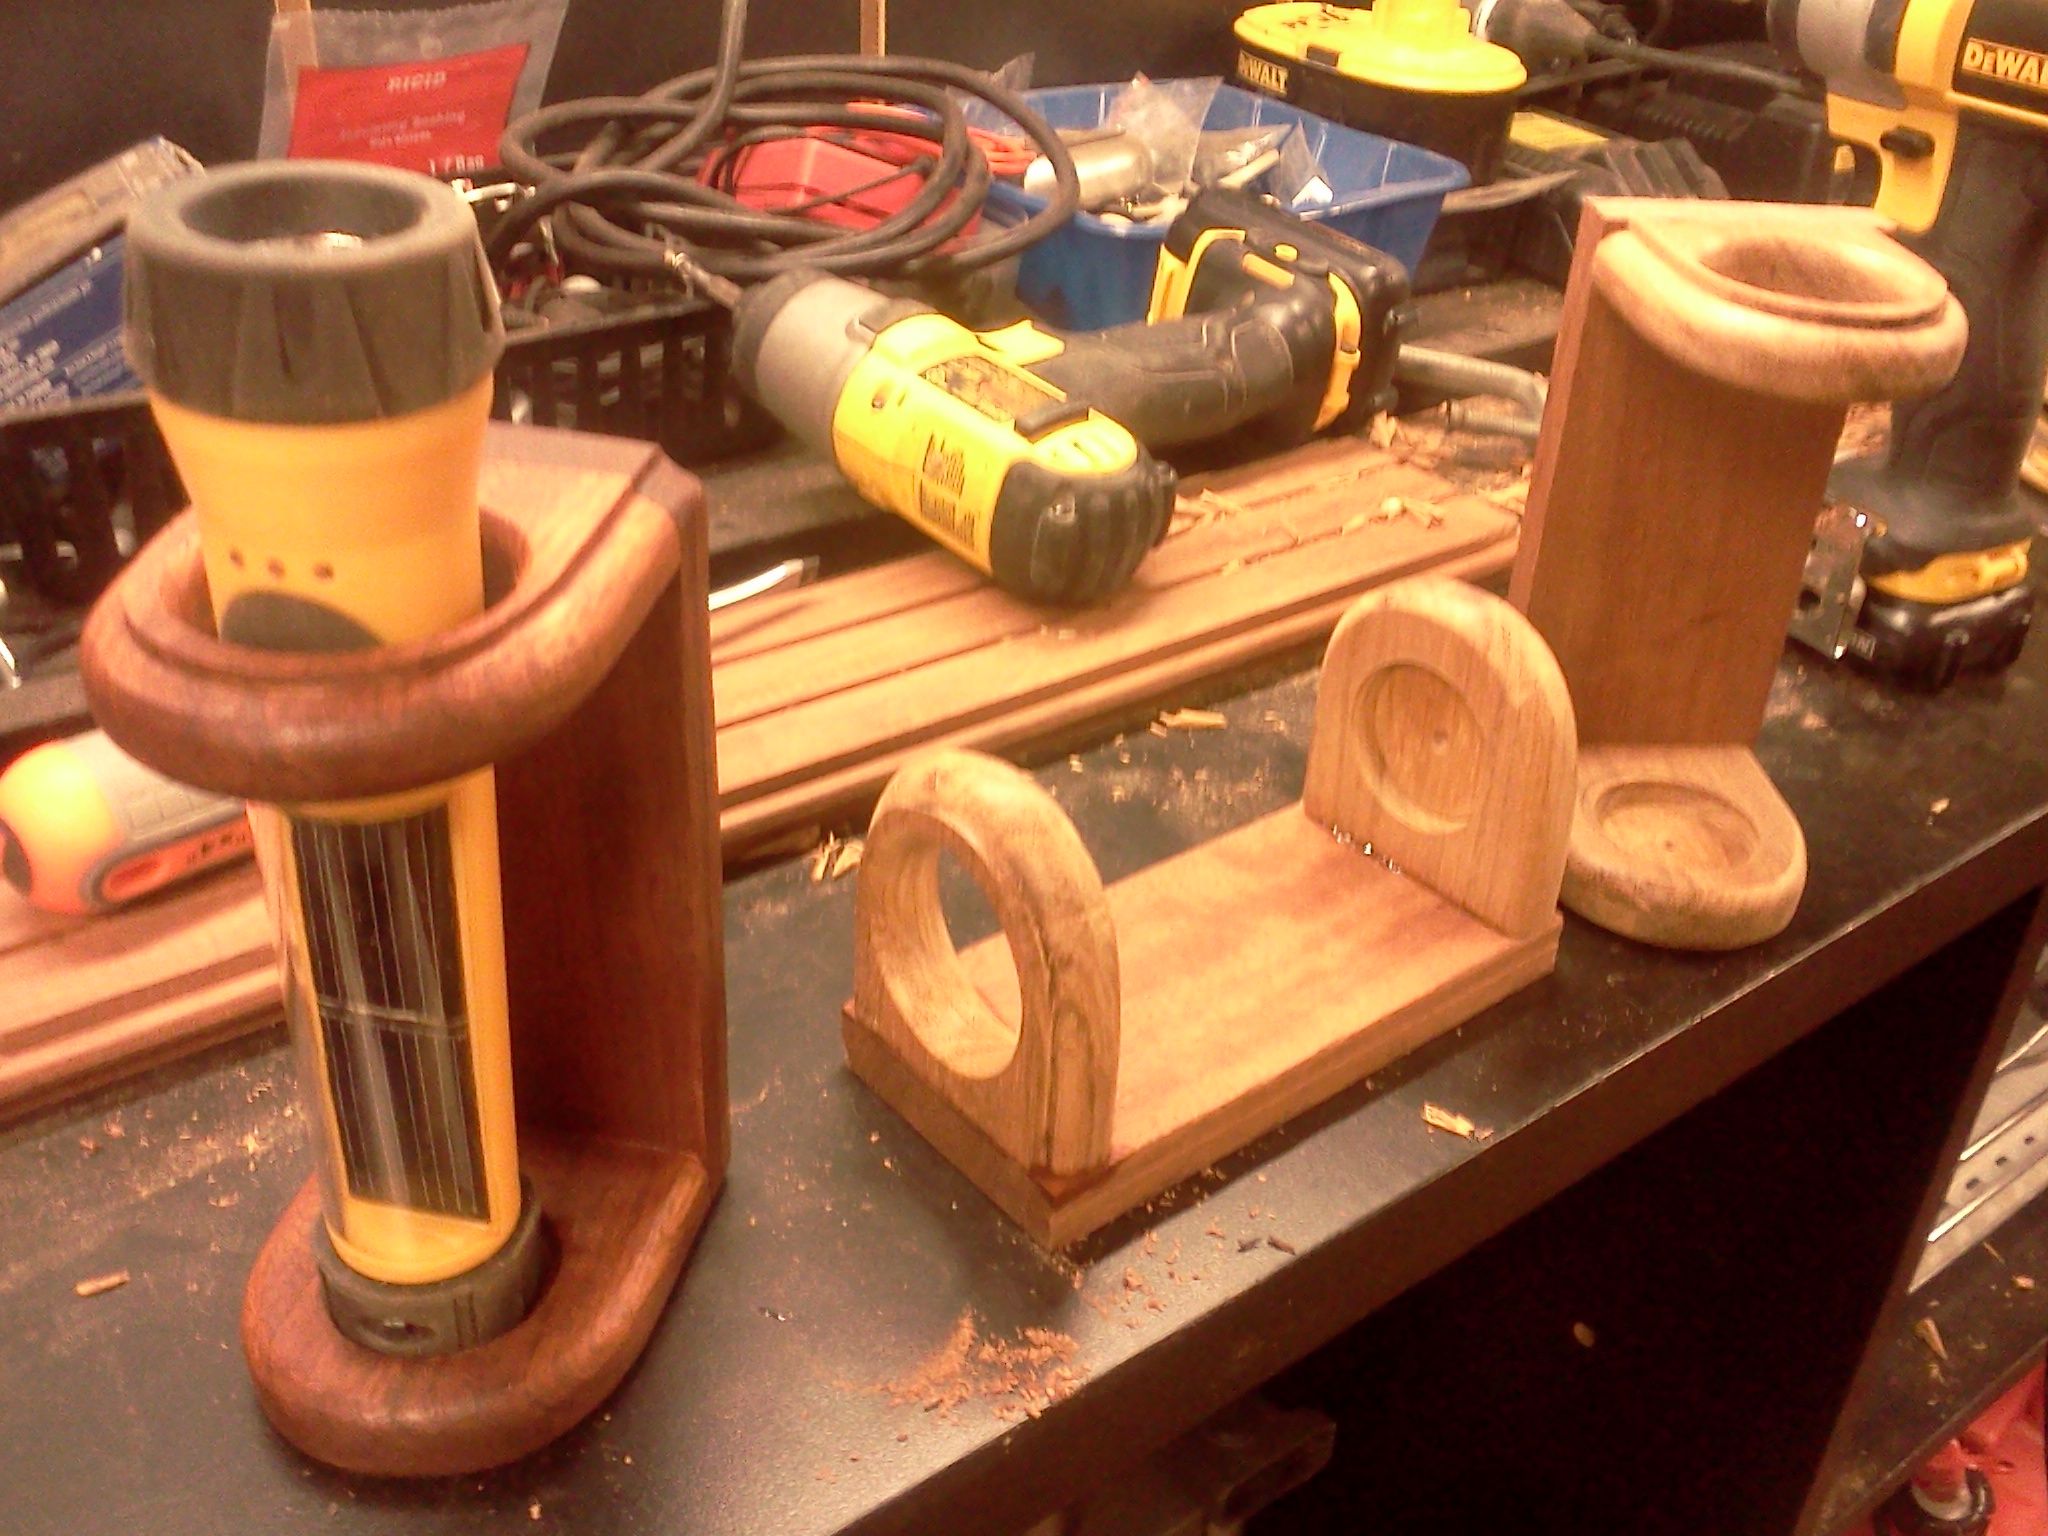
I made three holders for my flashlights. I have on in the aft cabin, one by the nav desk and one in the forward cabin. I had some mahogany flooring left and I planed and assembled these holders. Now the flashlights are always handy and where they are suposed to be. The flashlights are solar units that recharge while exposed to light. I have used them all winter long and have yet to recharge them.
Eyebrow update: I made them too thick. That wood is so dense it does not want to contour to the cabin. The first 6" have pulled away from the fiberglass. I will have to take them out and plane them down to 1/2" to make them more pliable.

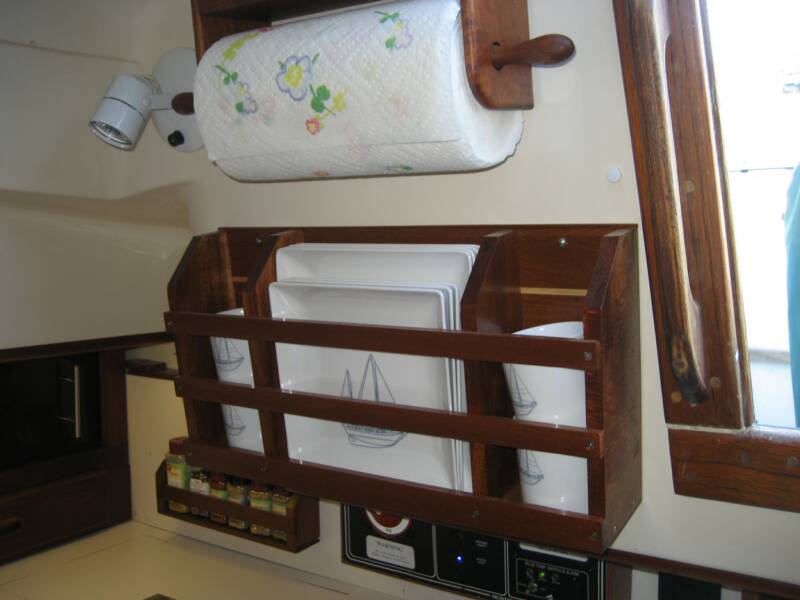
DISH RACK
I looked around for the best location for my new A/C - heat pump unit. After polling the members at the Cherubini owners website, I was able to ascertain where most of them were located.
Under galley sink, in rear cabin lower closet, above port settee, etc. However, the unit I purchased was 4" too big to fit into any of those locations, therefore I had to find more room. I made a cardboard box the size of the unit and spent a week end trying to shove it in many places. Finally, I arrived to the conclusion that it would have to fit under the nav station. Now the problem was to build a full size cabinet all the way to the floor or a half cabinet that still would allow me to seat on the settee and stick my feet under the station. This location would allow me to have 2 vents, one large facing forward and blowing through the head into the forward cabin, and a smaller one, out of the rear of the nav desk, blowing into the aft cabin.
Would you believe there were 27 screw holes in this area. I guess it is a popular place to hang stuff on these boat. The dish rack available did not cover all my holes so I decided to make my own out of mahogany and a piece of sole I had leftover. Now all the holes are gone, and my dishes and cups fit perfectly my new rack
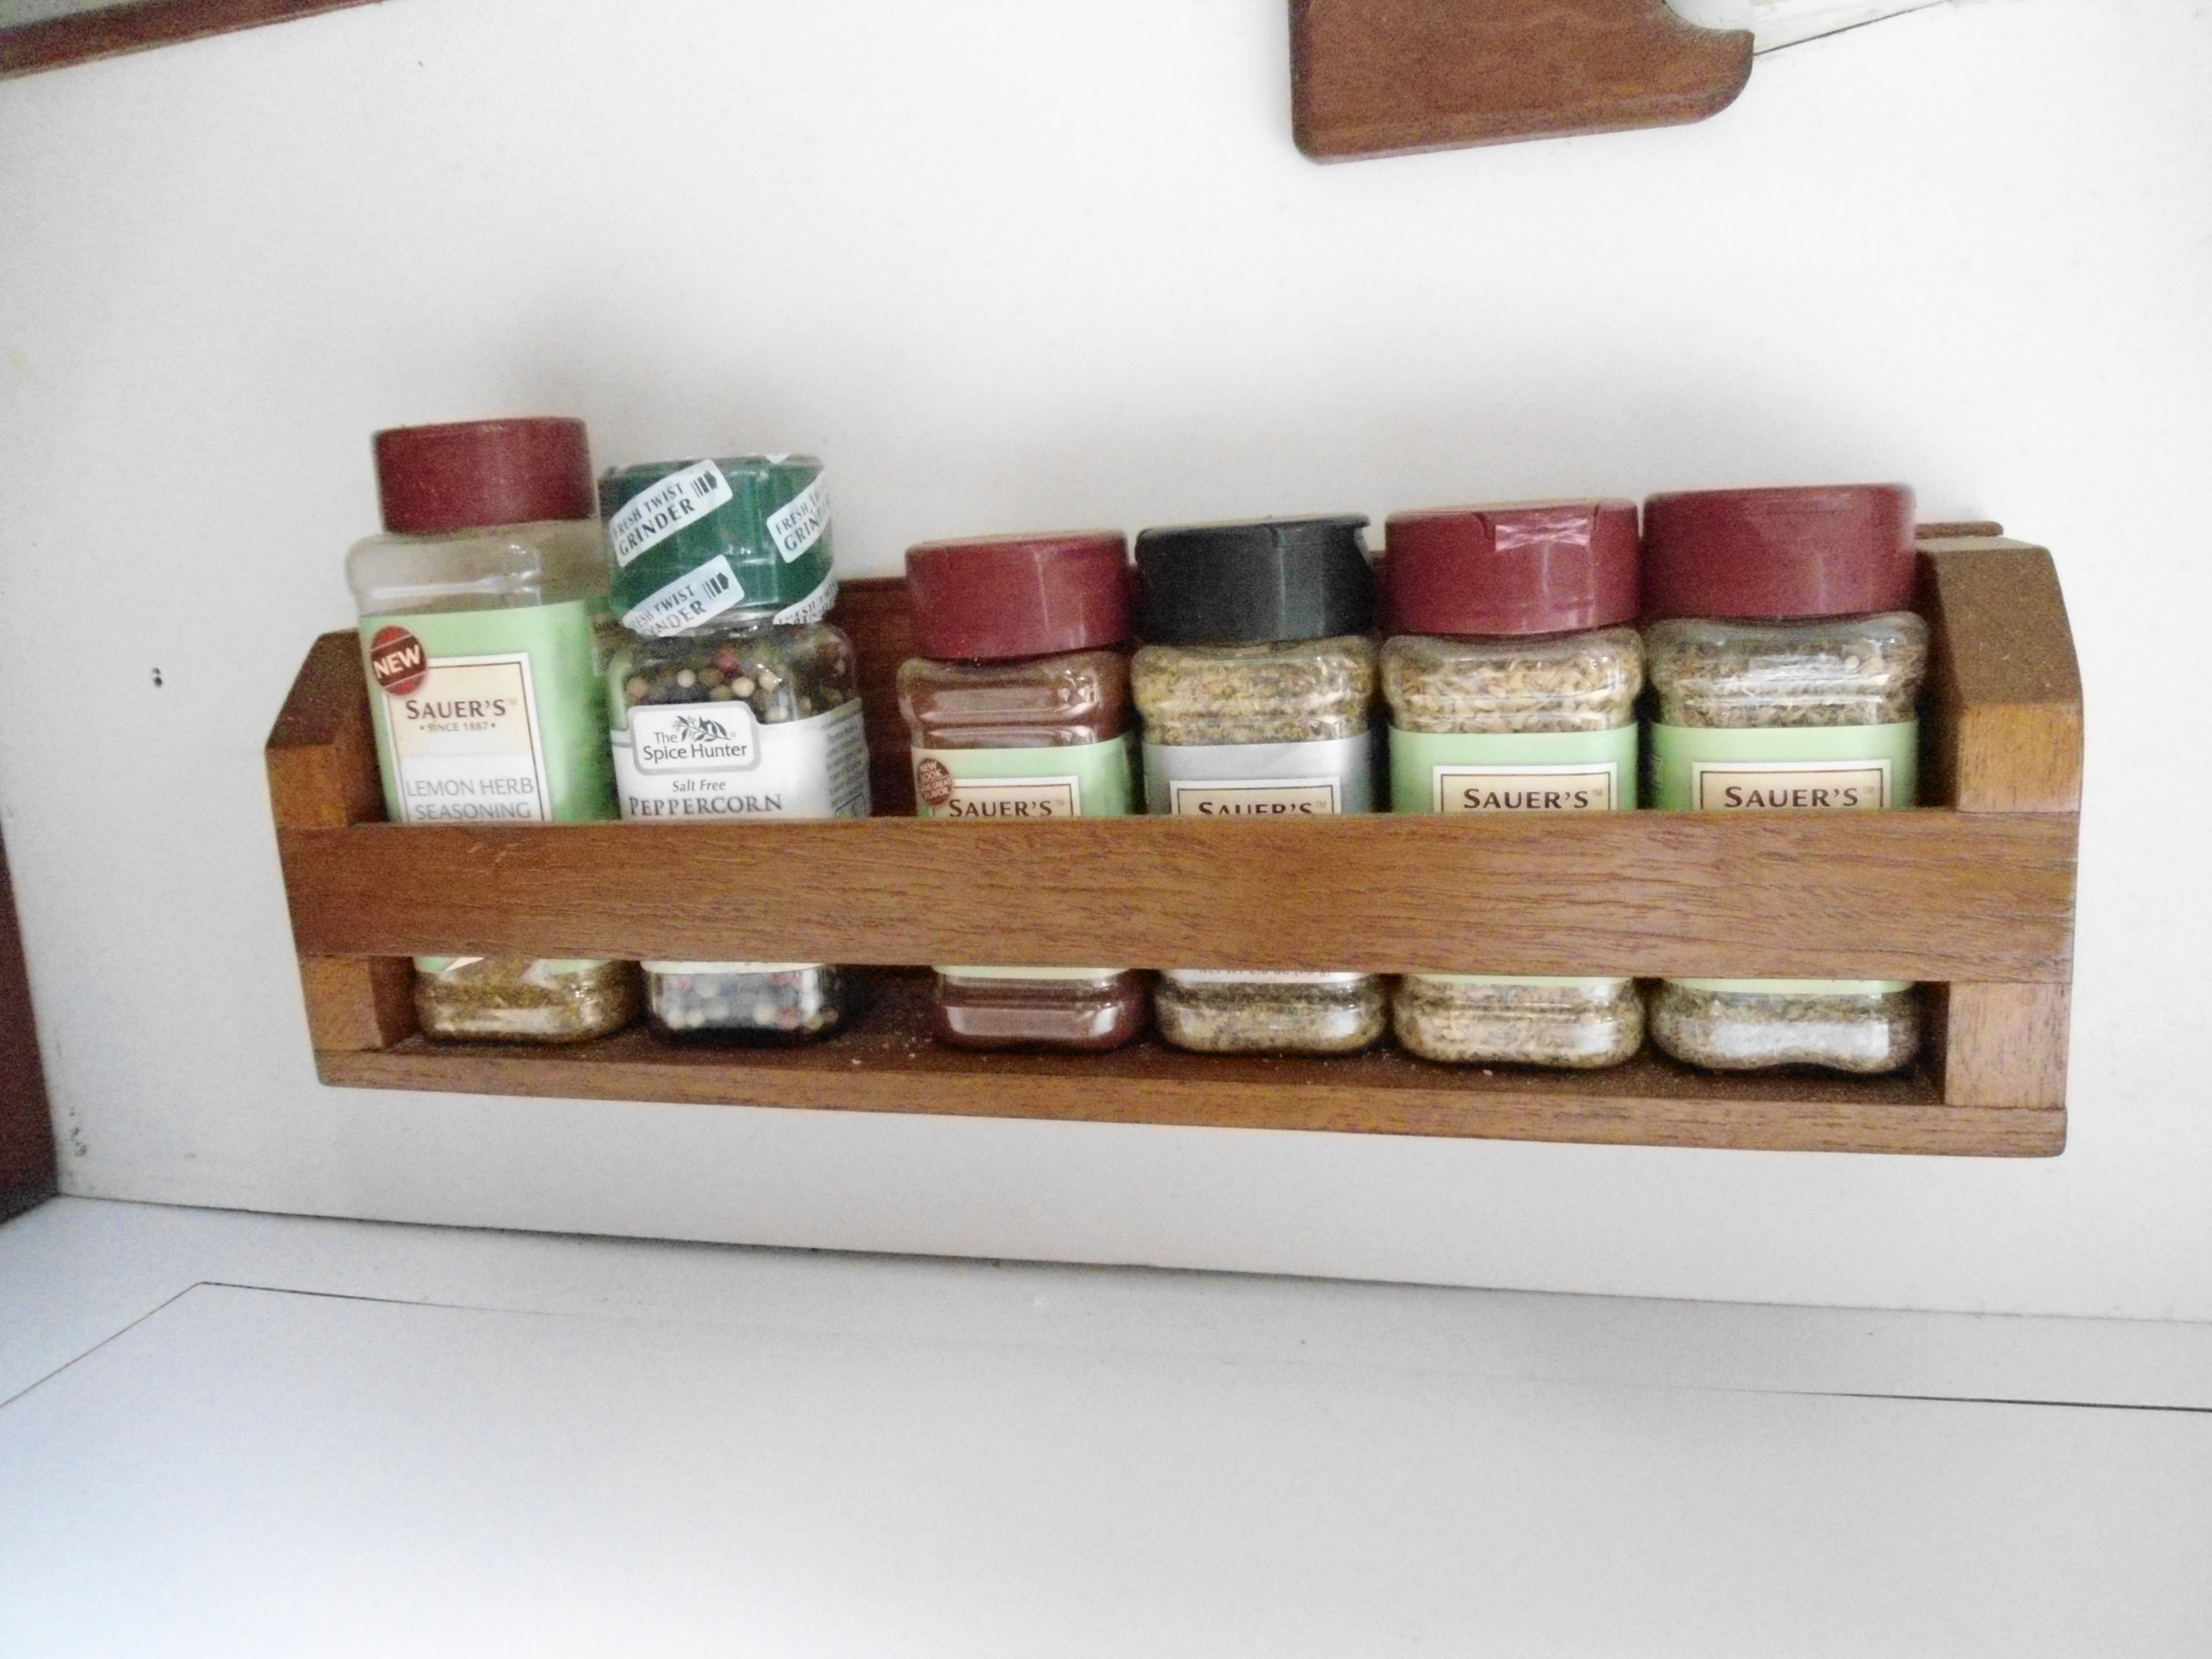
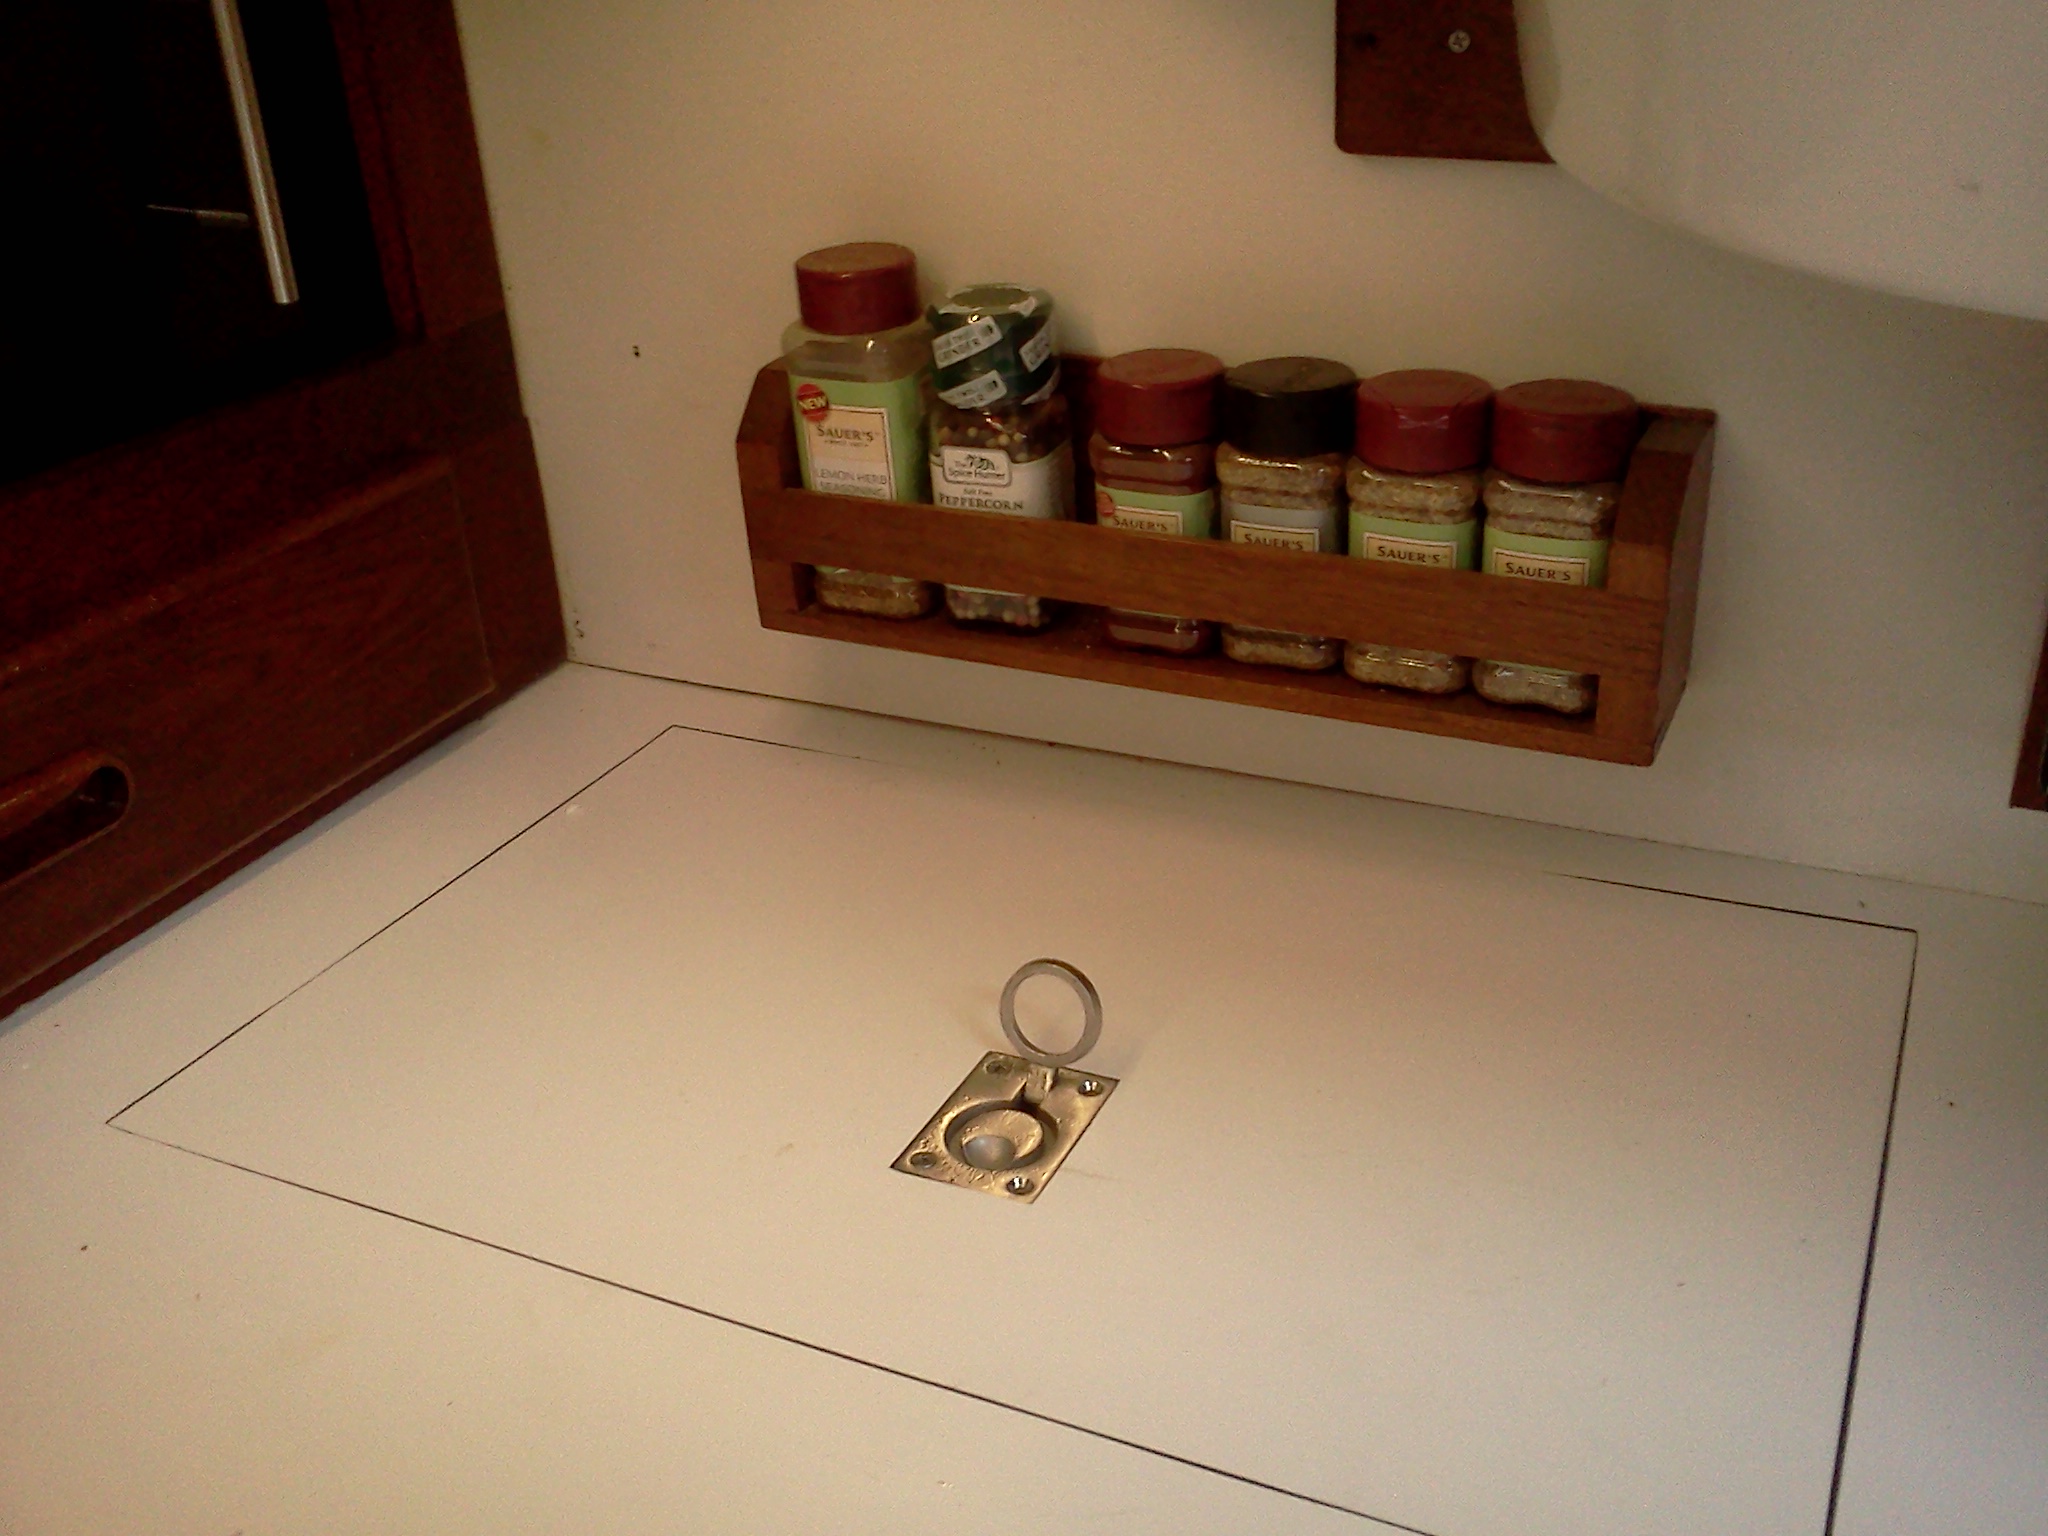
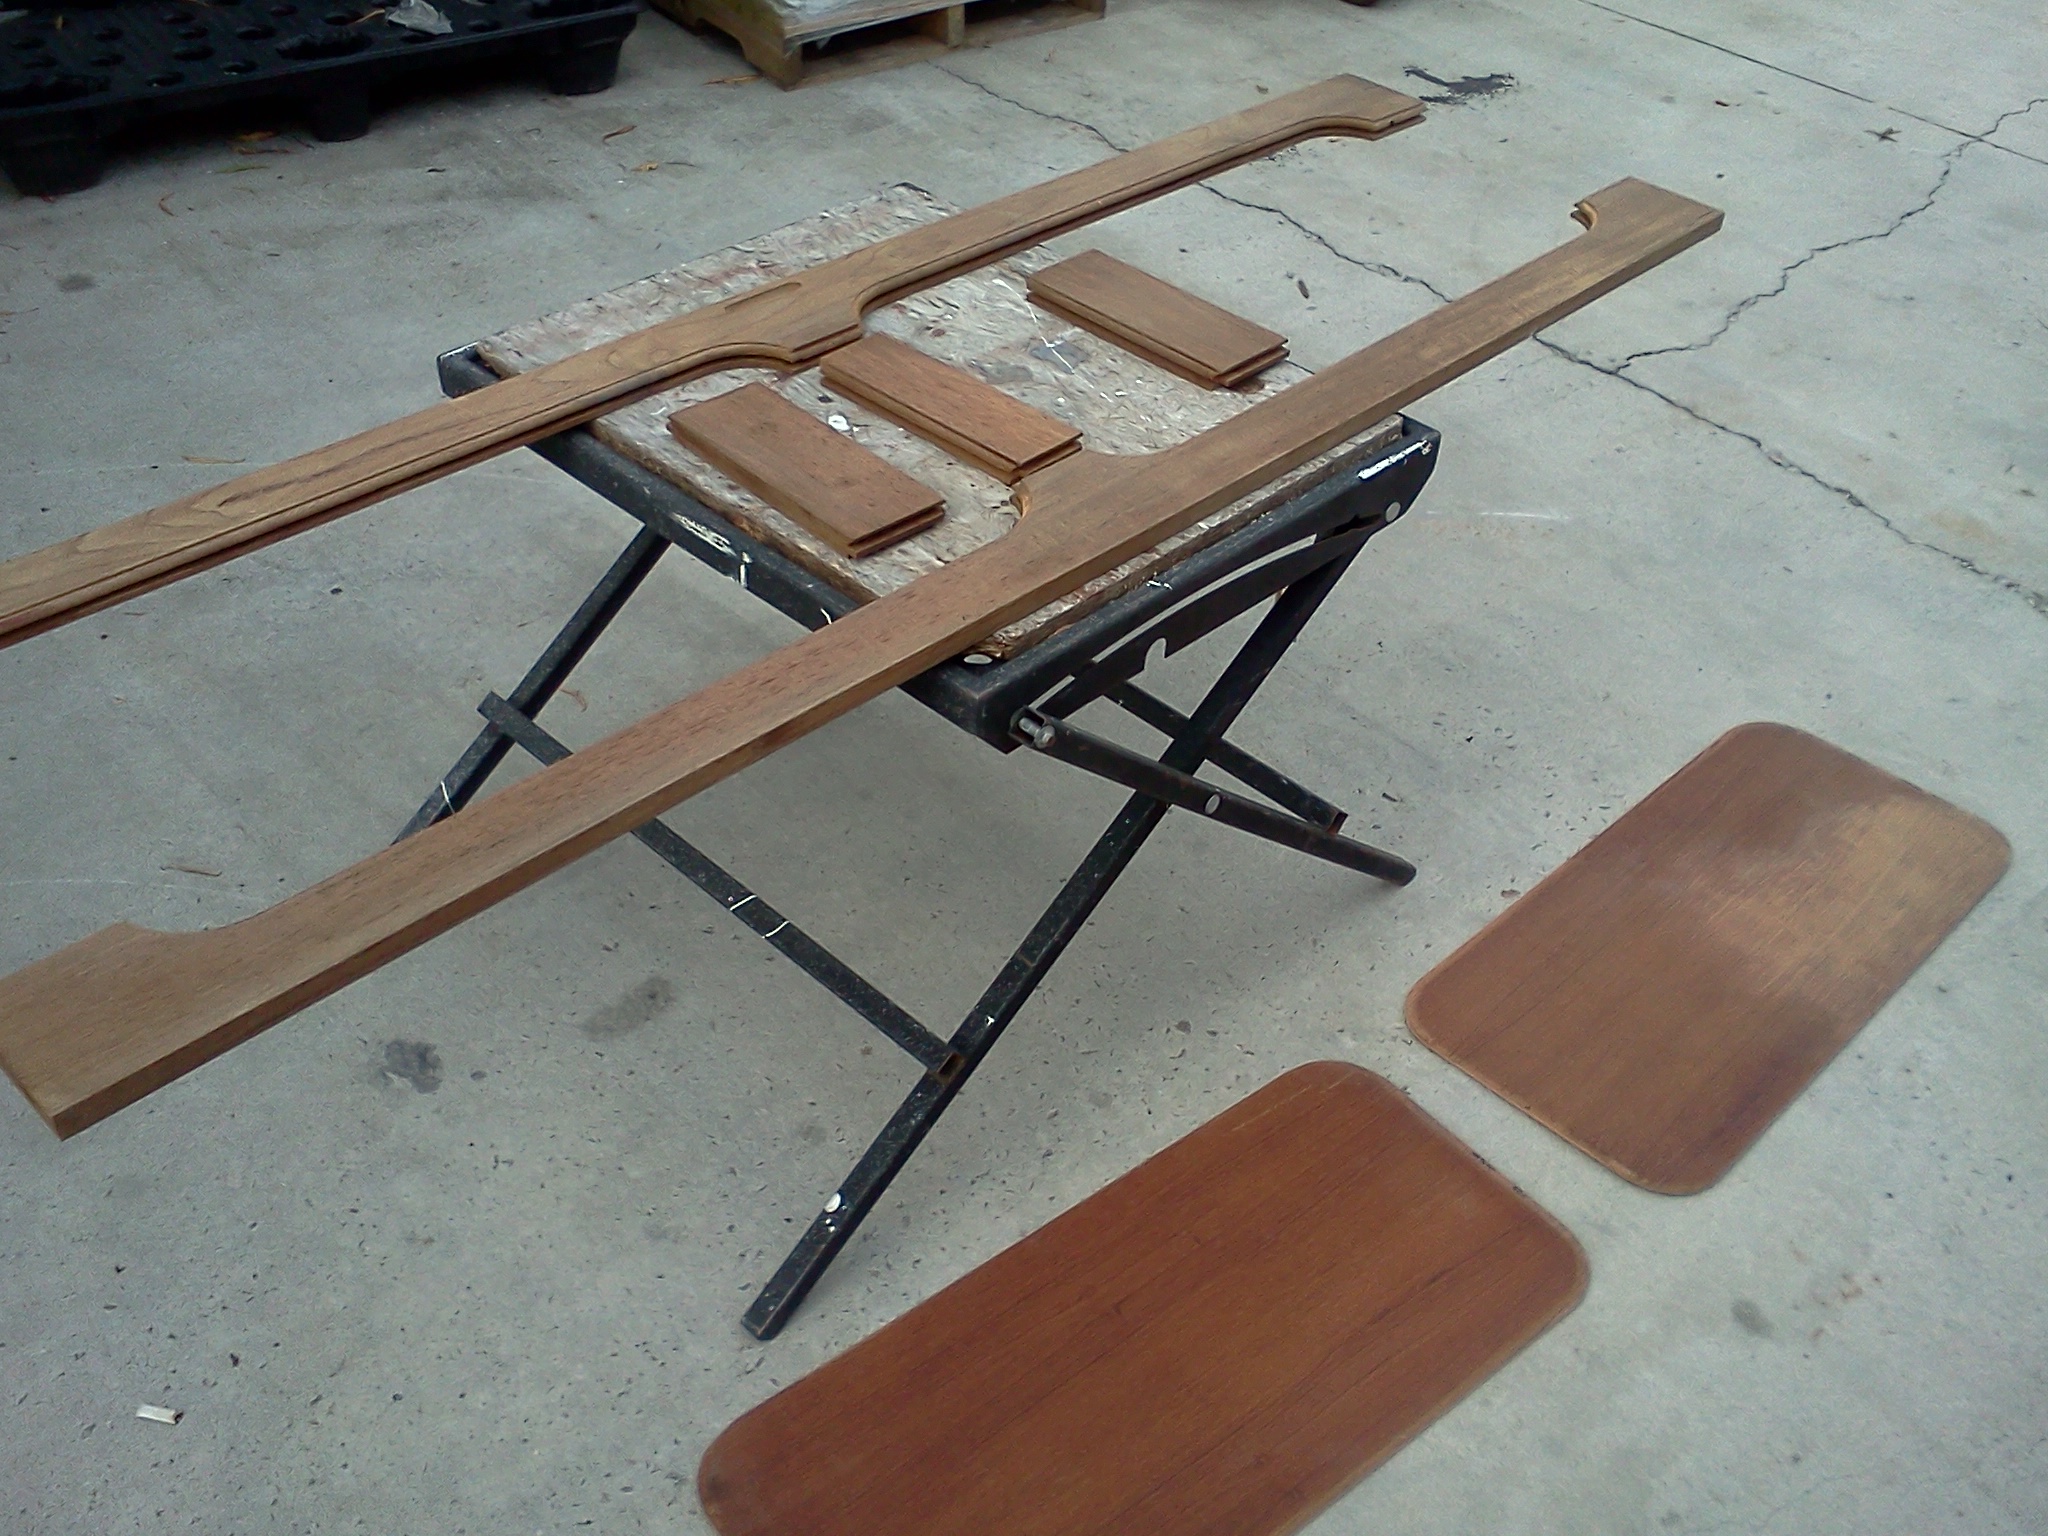
SPICE RACK

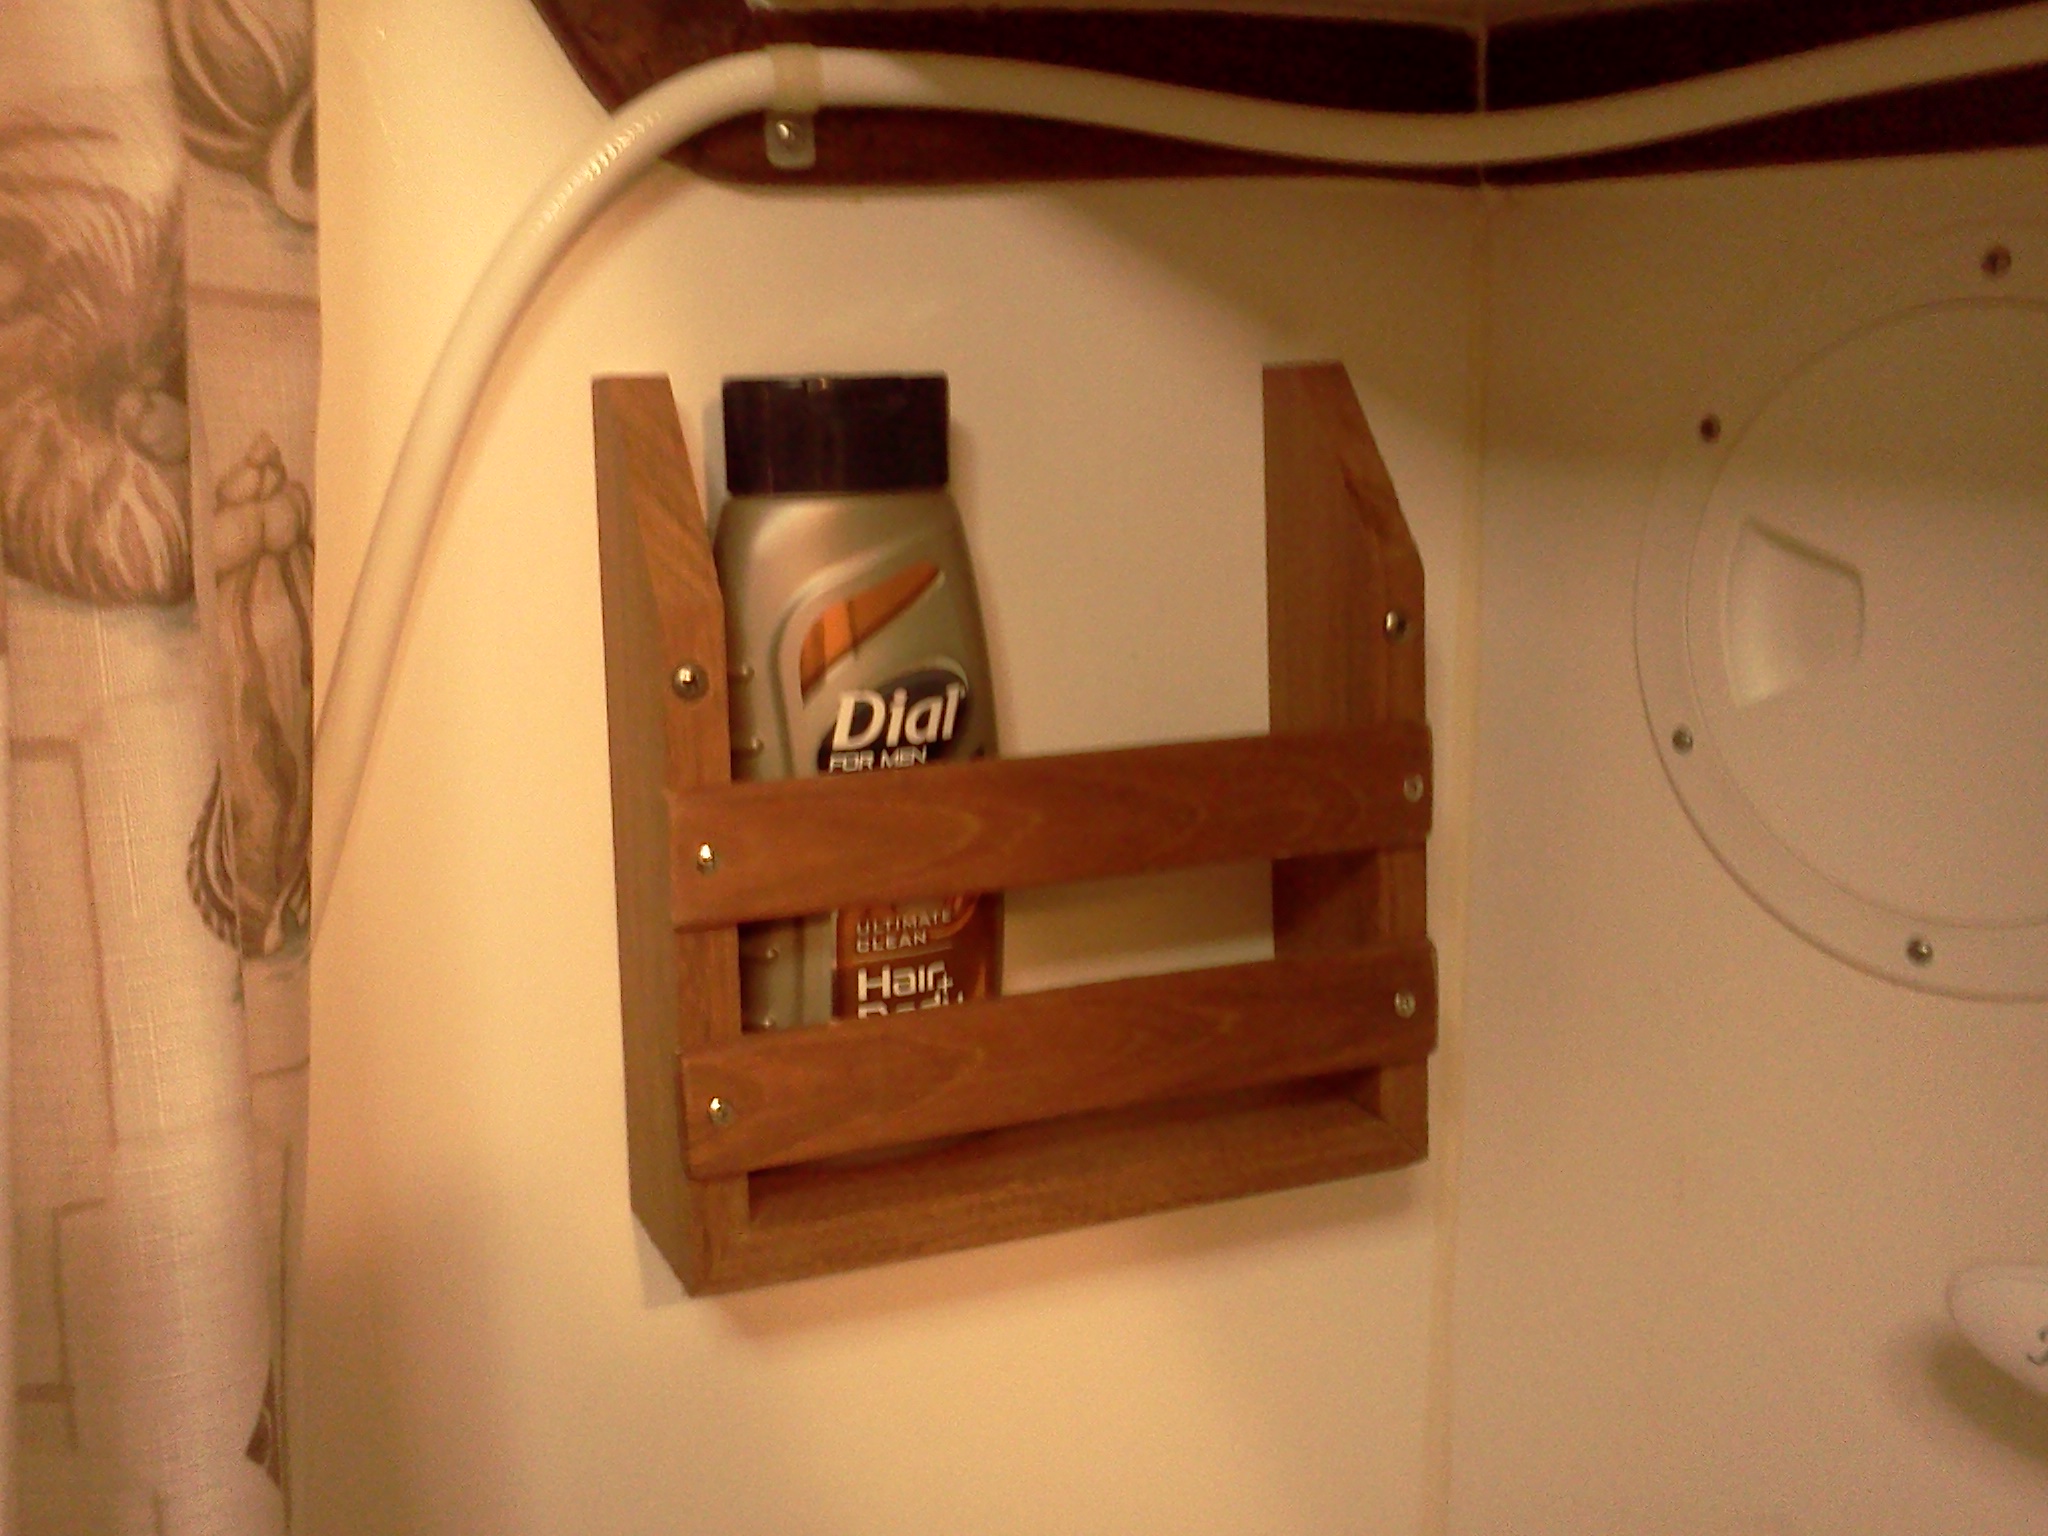
SHOWER CADDY
More mahogany flooring was cut, sanded and planed to make these two items.
Spices for the galley: Cant live without my garlic salt, Italian spices , etc.
The shower caddy is used to store the bottles of body soap. Who uses a soap bar anymore?? I just wanted to be able to keep them from flying all over the shower while under way.
I was out of teak plywood by the time this project came along so I found 2 pieces on ebay with vertical grain that fitted my project. It was 1/4" so I glued to a 1/2 maple plywood to get to the 3/4 needed. I made a corner out of a leftover piece of teak.
Rear Cabin Door

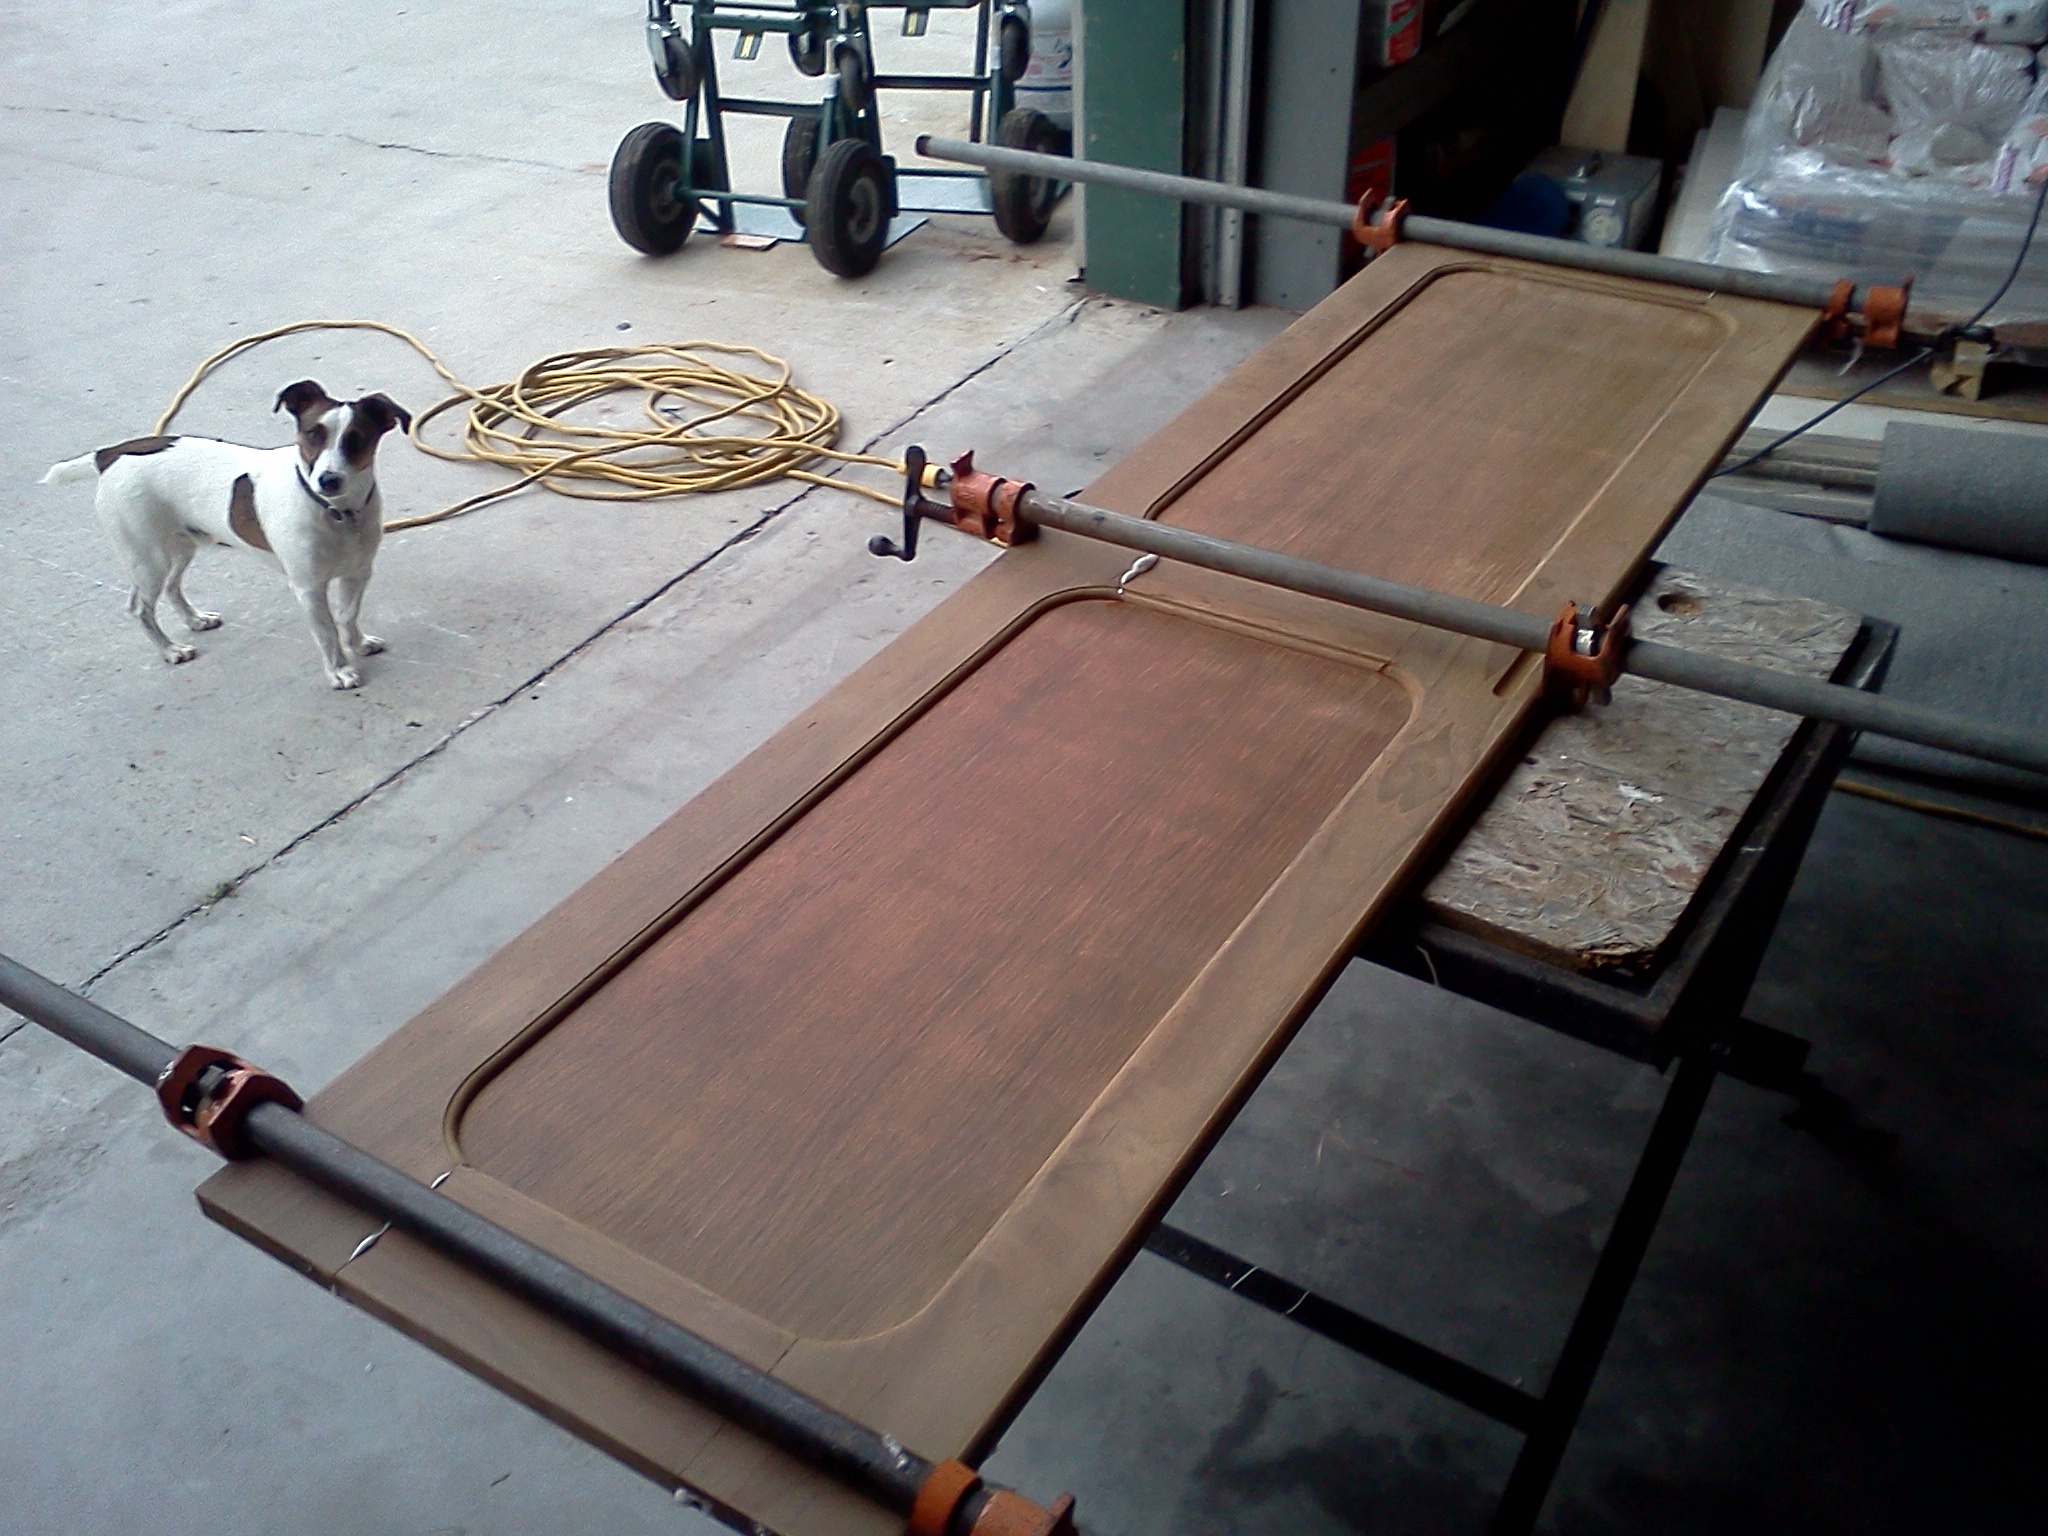
The door to the rear cabin fell apart. The glue had dissolved. After using a five in one tool to open the joints, It came apart and all dowels were still in good shape. I used polyurethane glue (gorilla Glue) and clamps to put it back together.
WARNING: if you use this glue, use half of the amount you think you need. I will foam up and ooze out of the joints. Will sand off but makes a mess. It is moisture cured so if you wet the two wood faces before applying the glue, it will work even better.
SPICE RACK
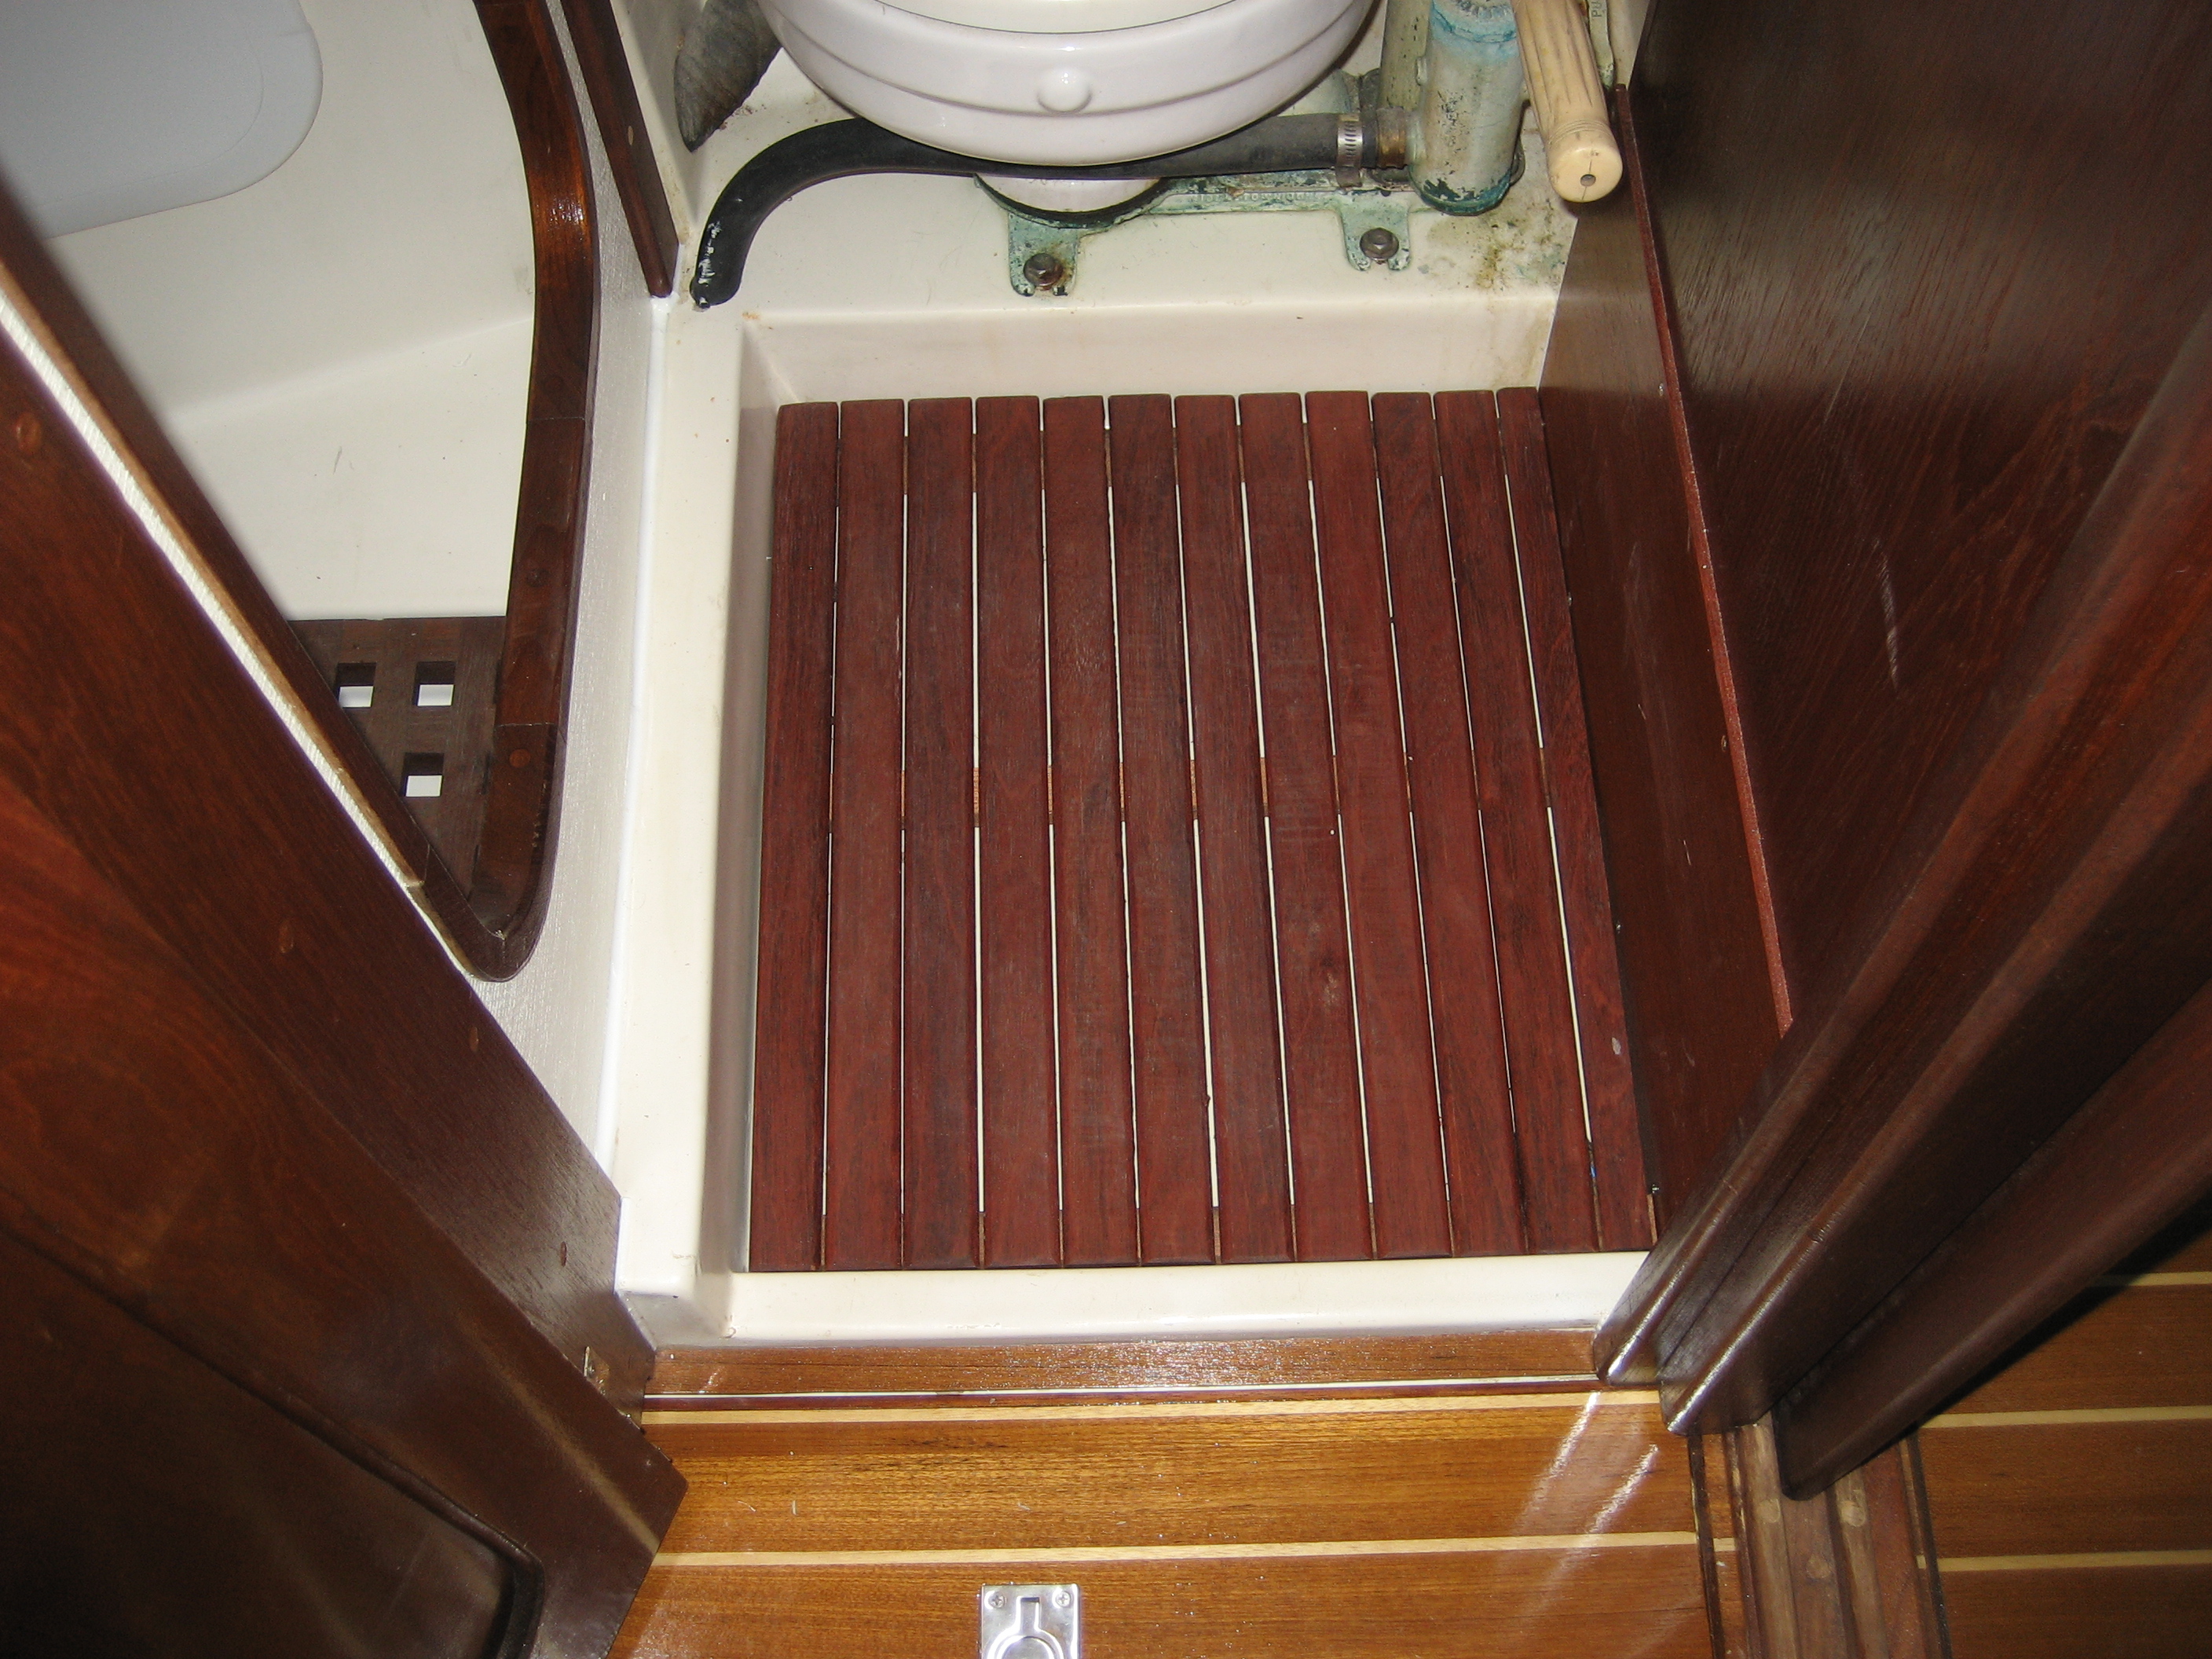
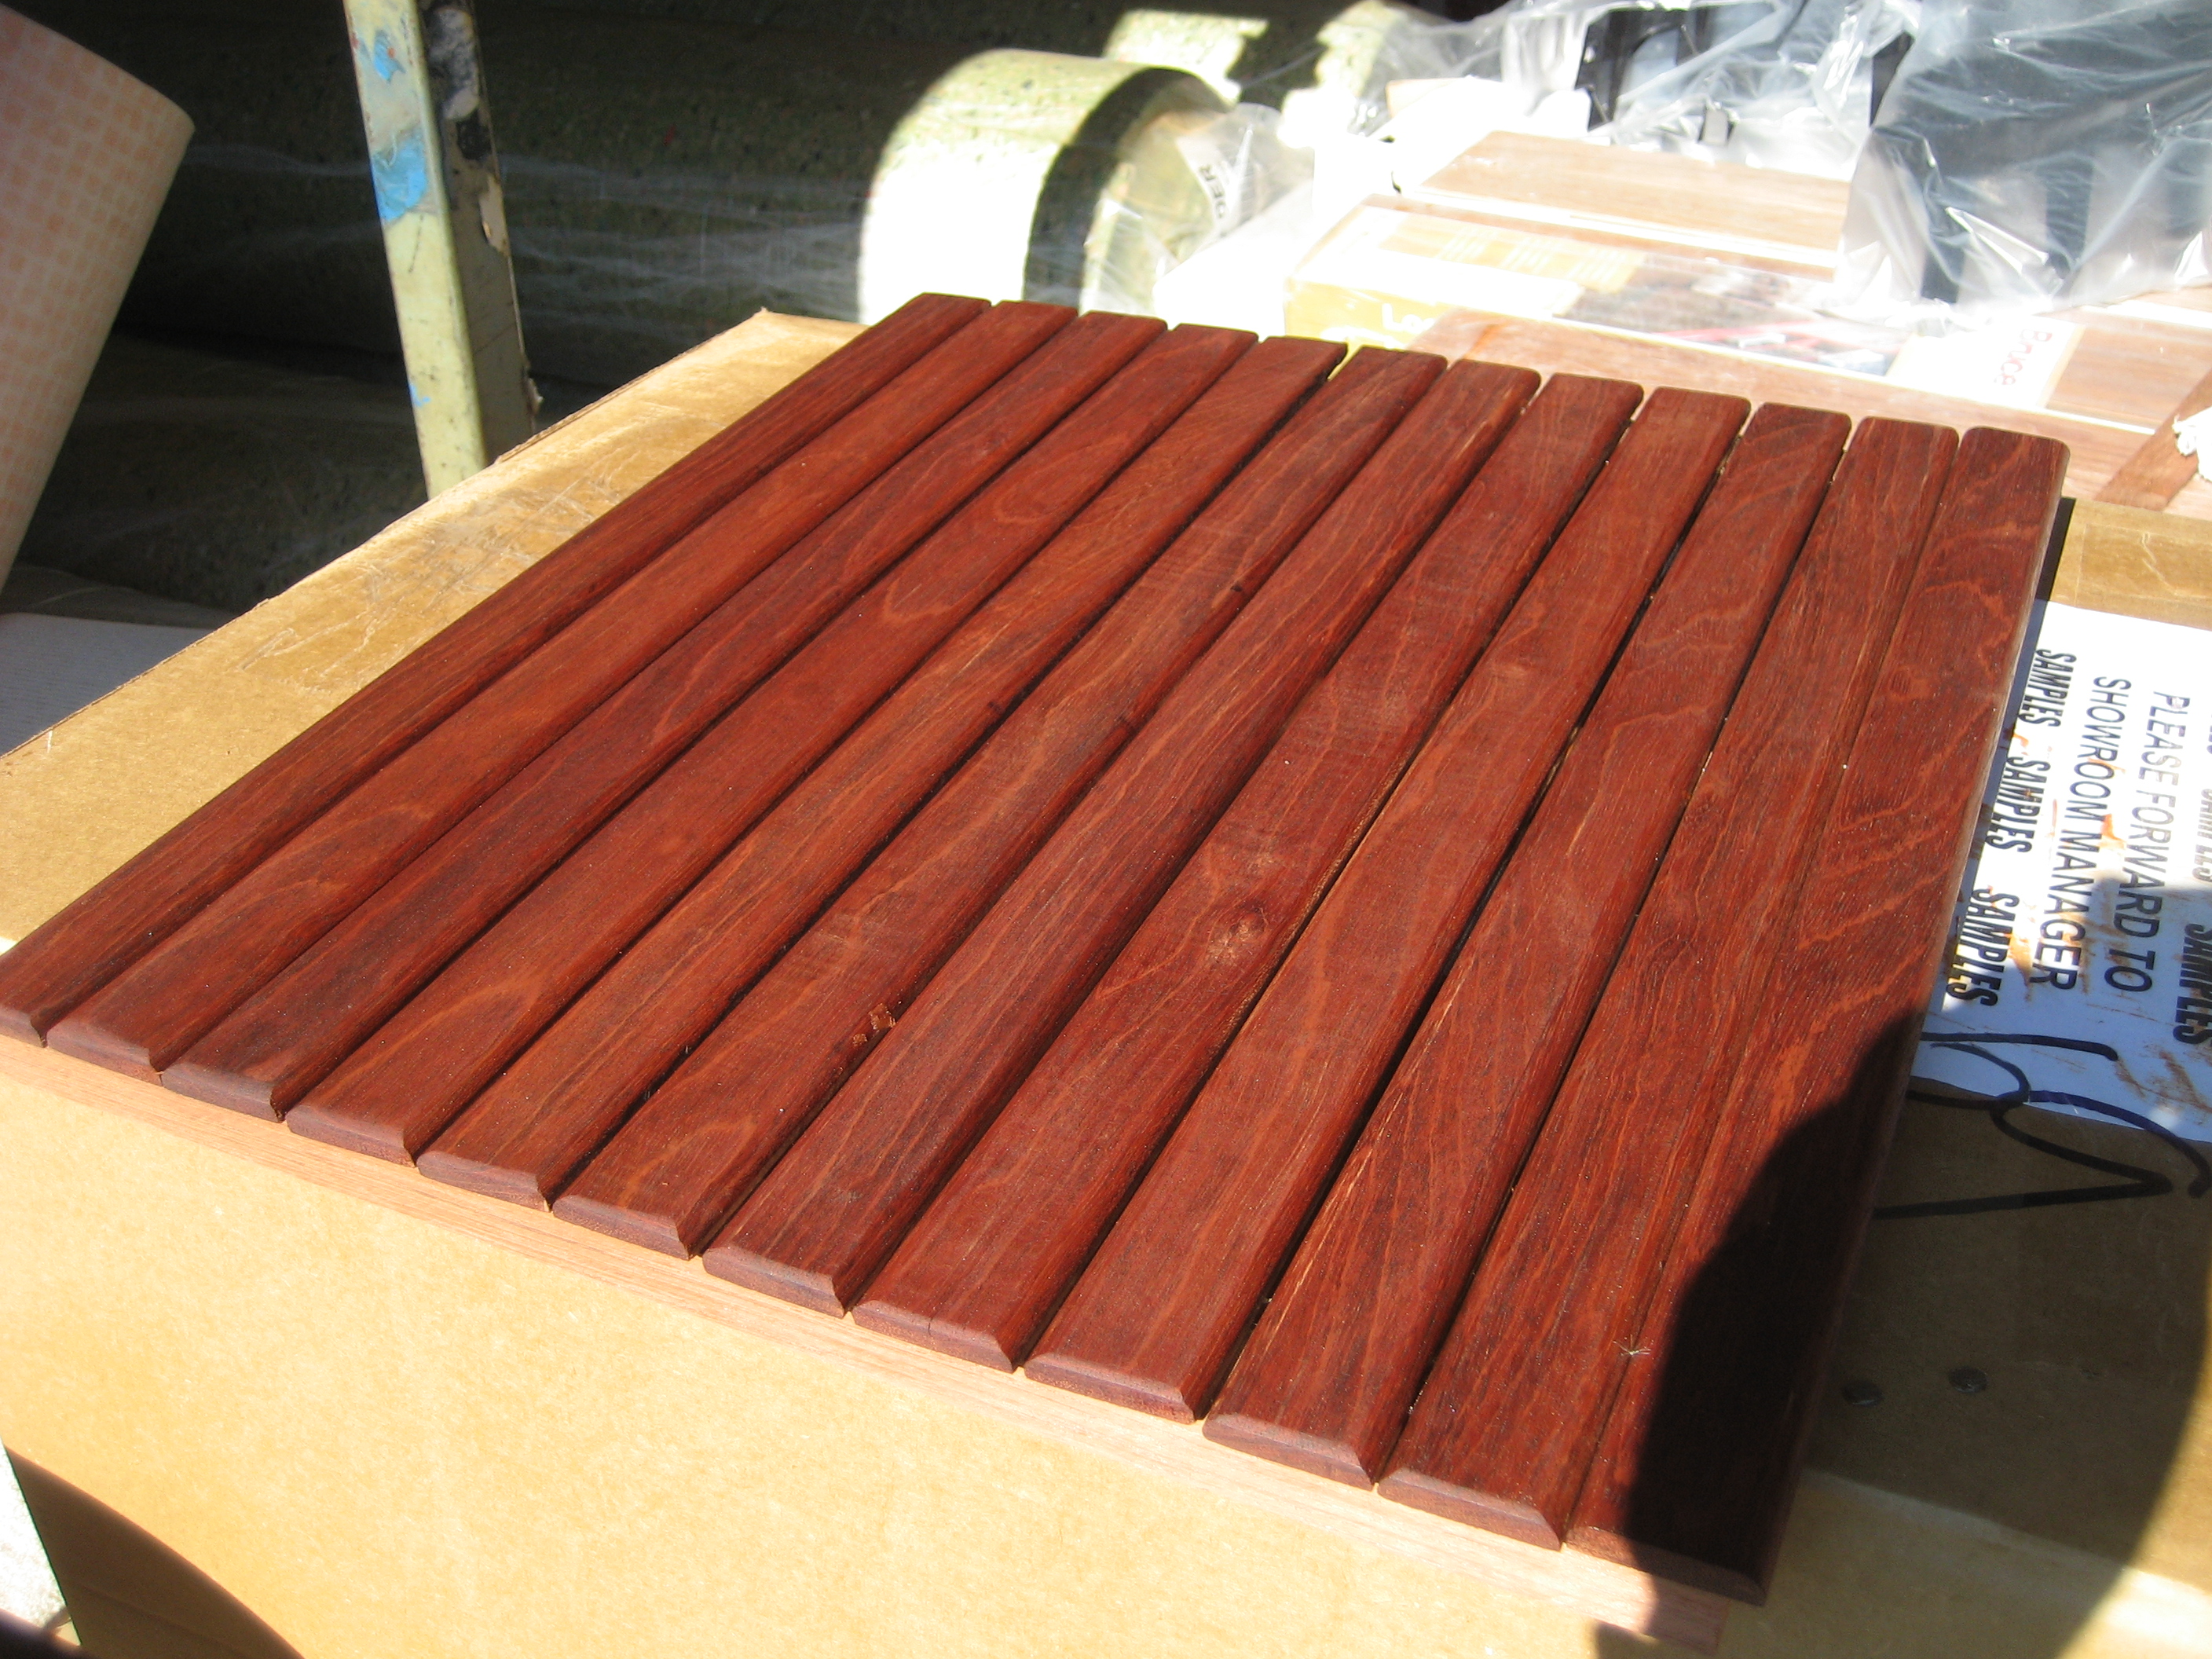
The head had a teak grate in the shower area but bare floor in the head area. Decided that a slat mat would do the job of keeping the feet dry.
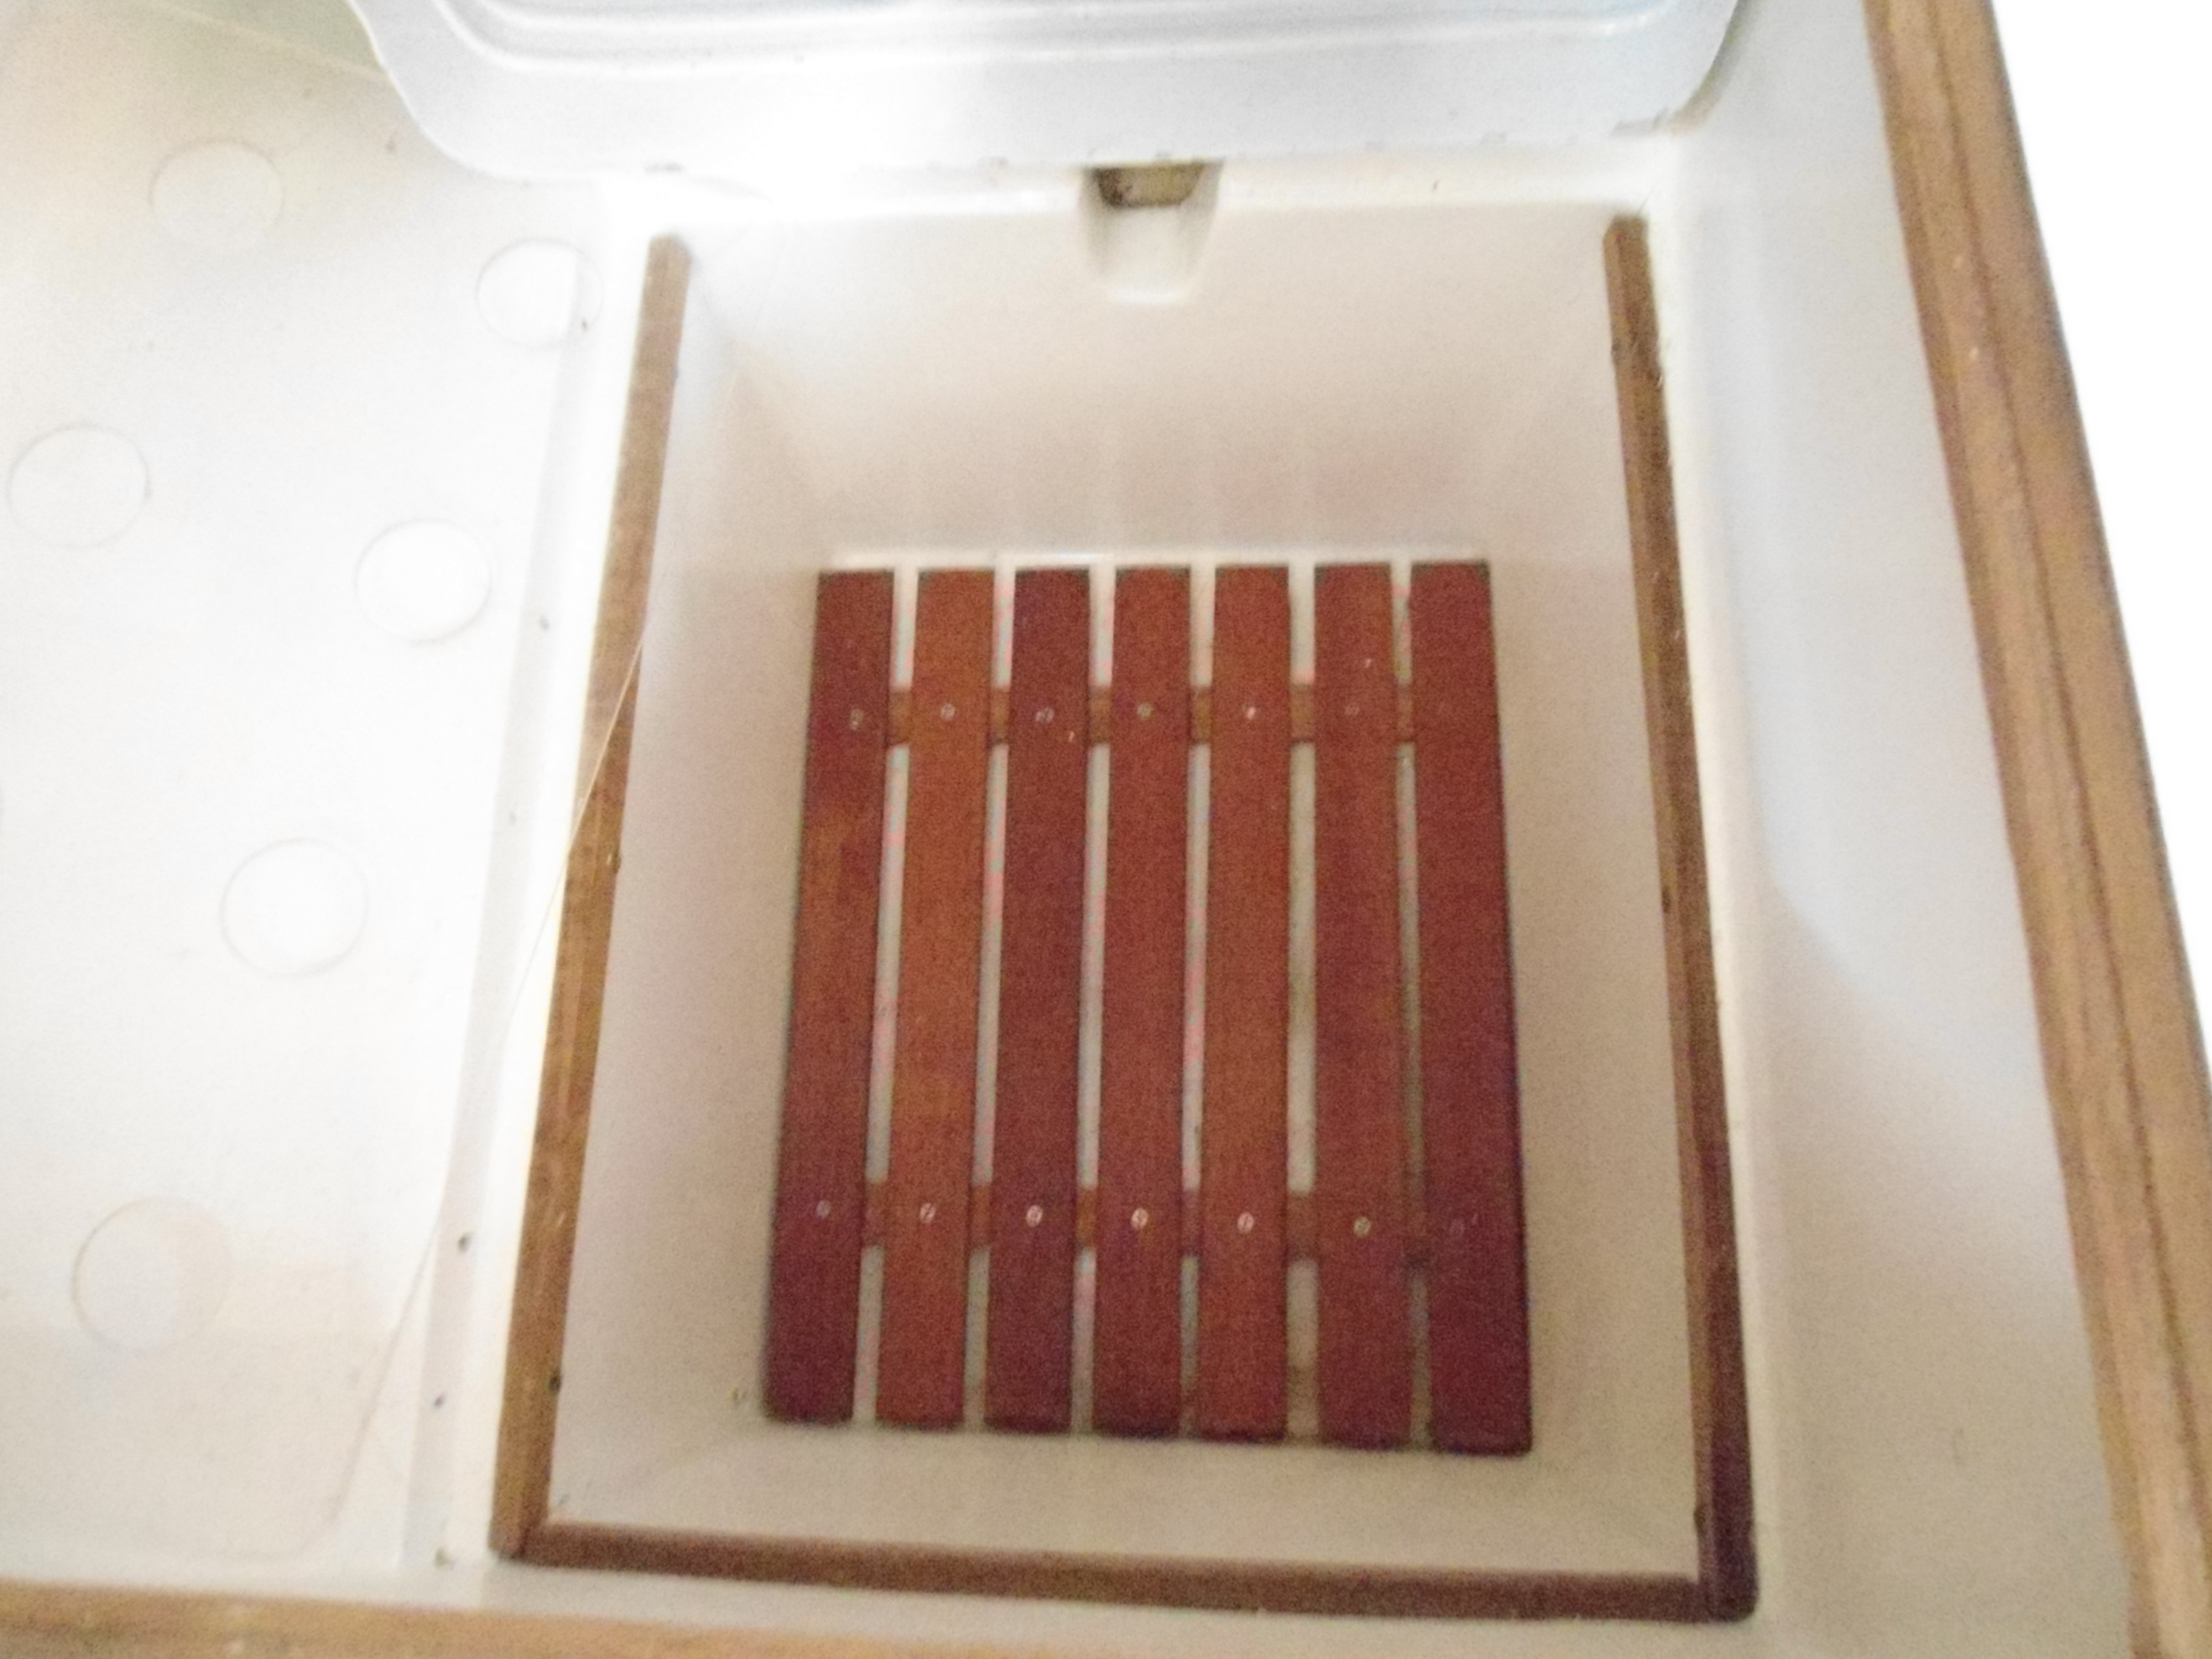
Slat rack for fridge bottom


May 4 , 2013
Another lousy weekend. It looks like Hurricane season. 70 degrees and rain, then sunshine, then rain again. Most week end spent dodging showers and high winds. Crappy weather. Although it could be worse. I unloaded an 18 wheeler on Thursday that brought 20K sq ft of Connor maple flooring for a new gym we are building in N.C. He came from Laona, WI and told me that they still had 1ft of snow on the ground when he left on Tuesday. I guess it could be worse for us.
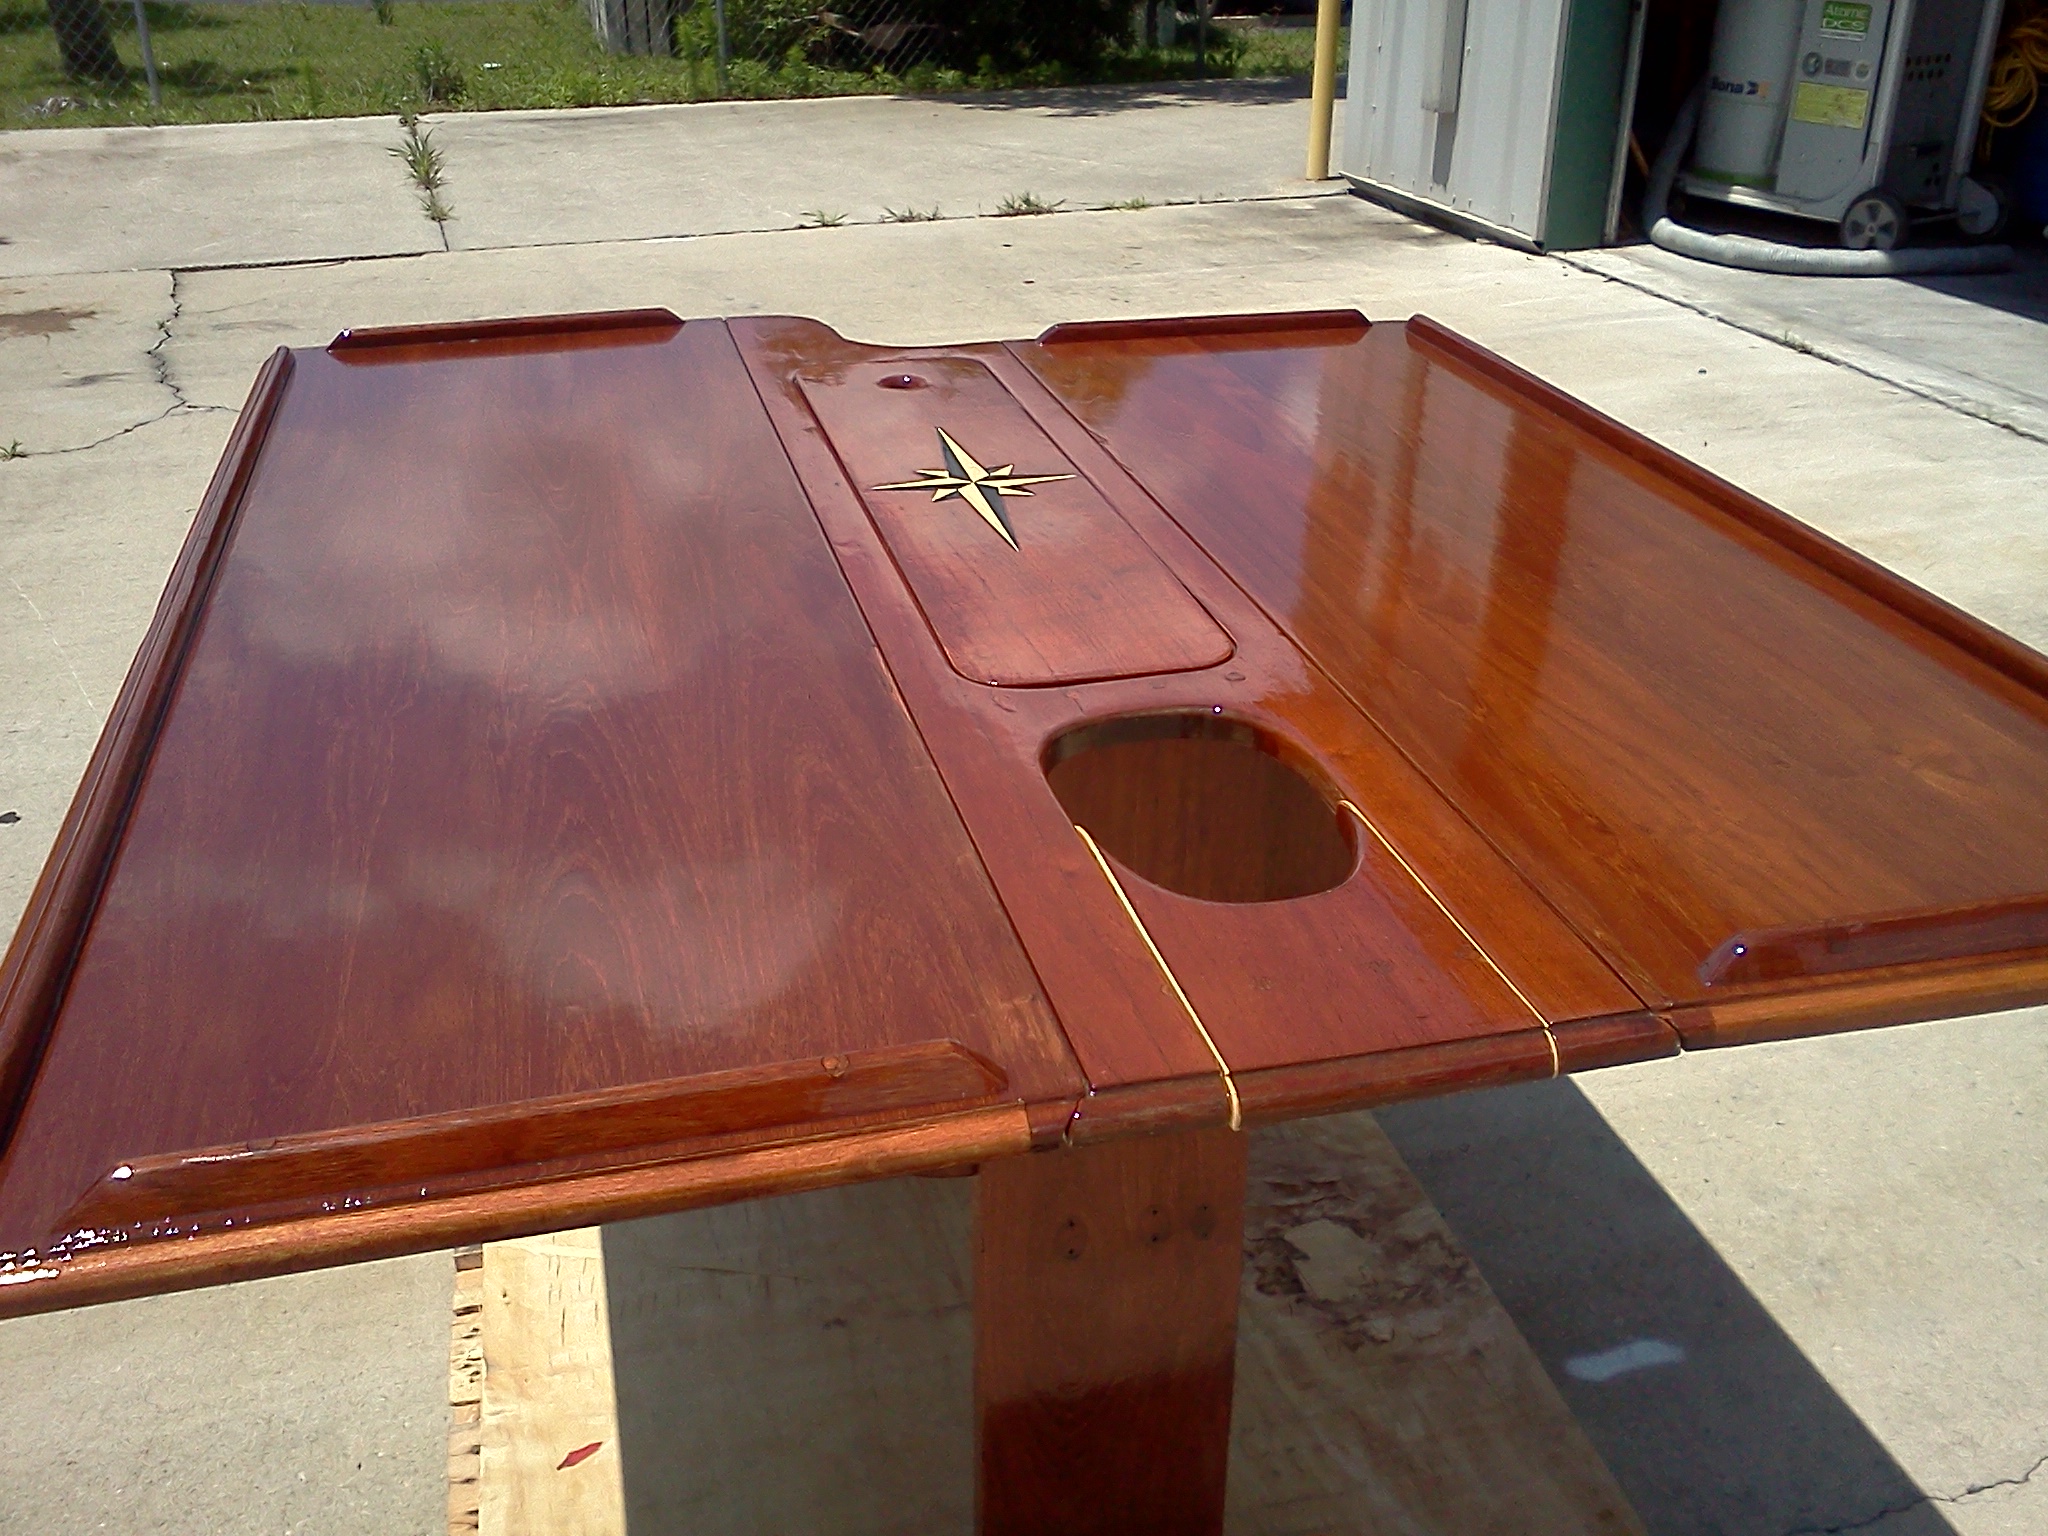
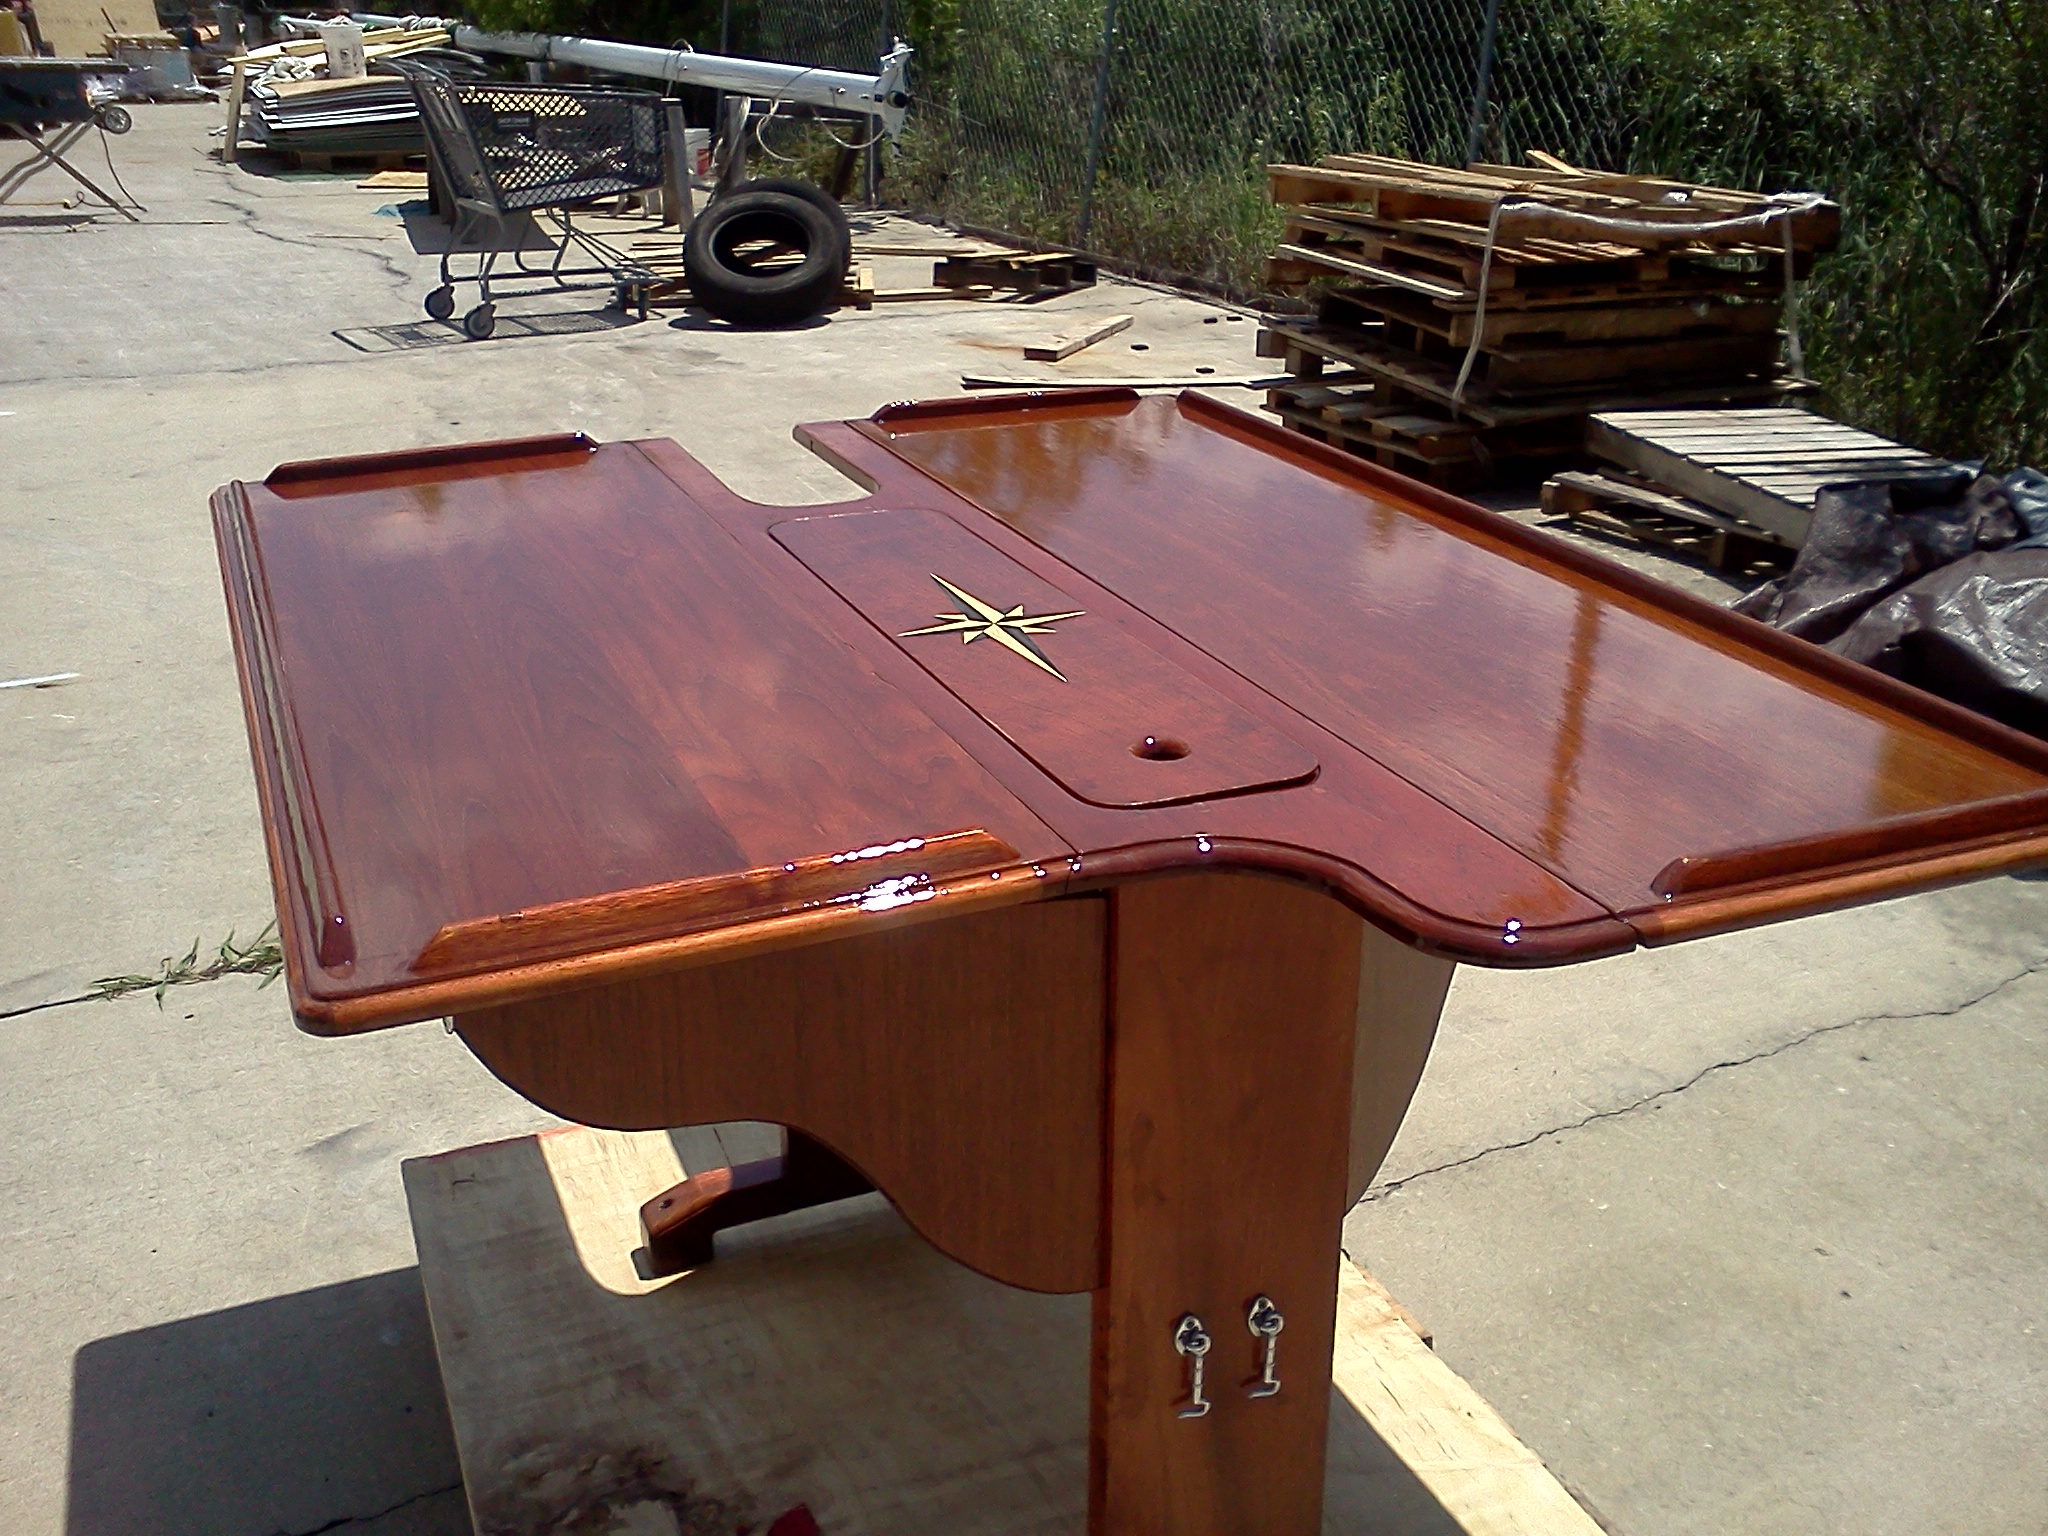
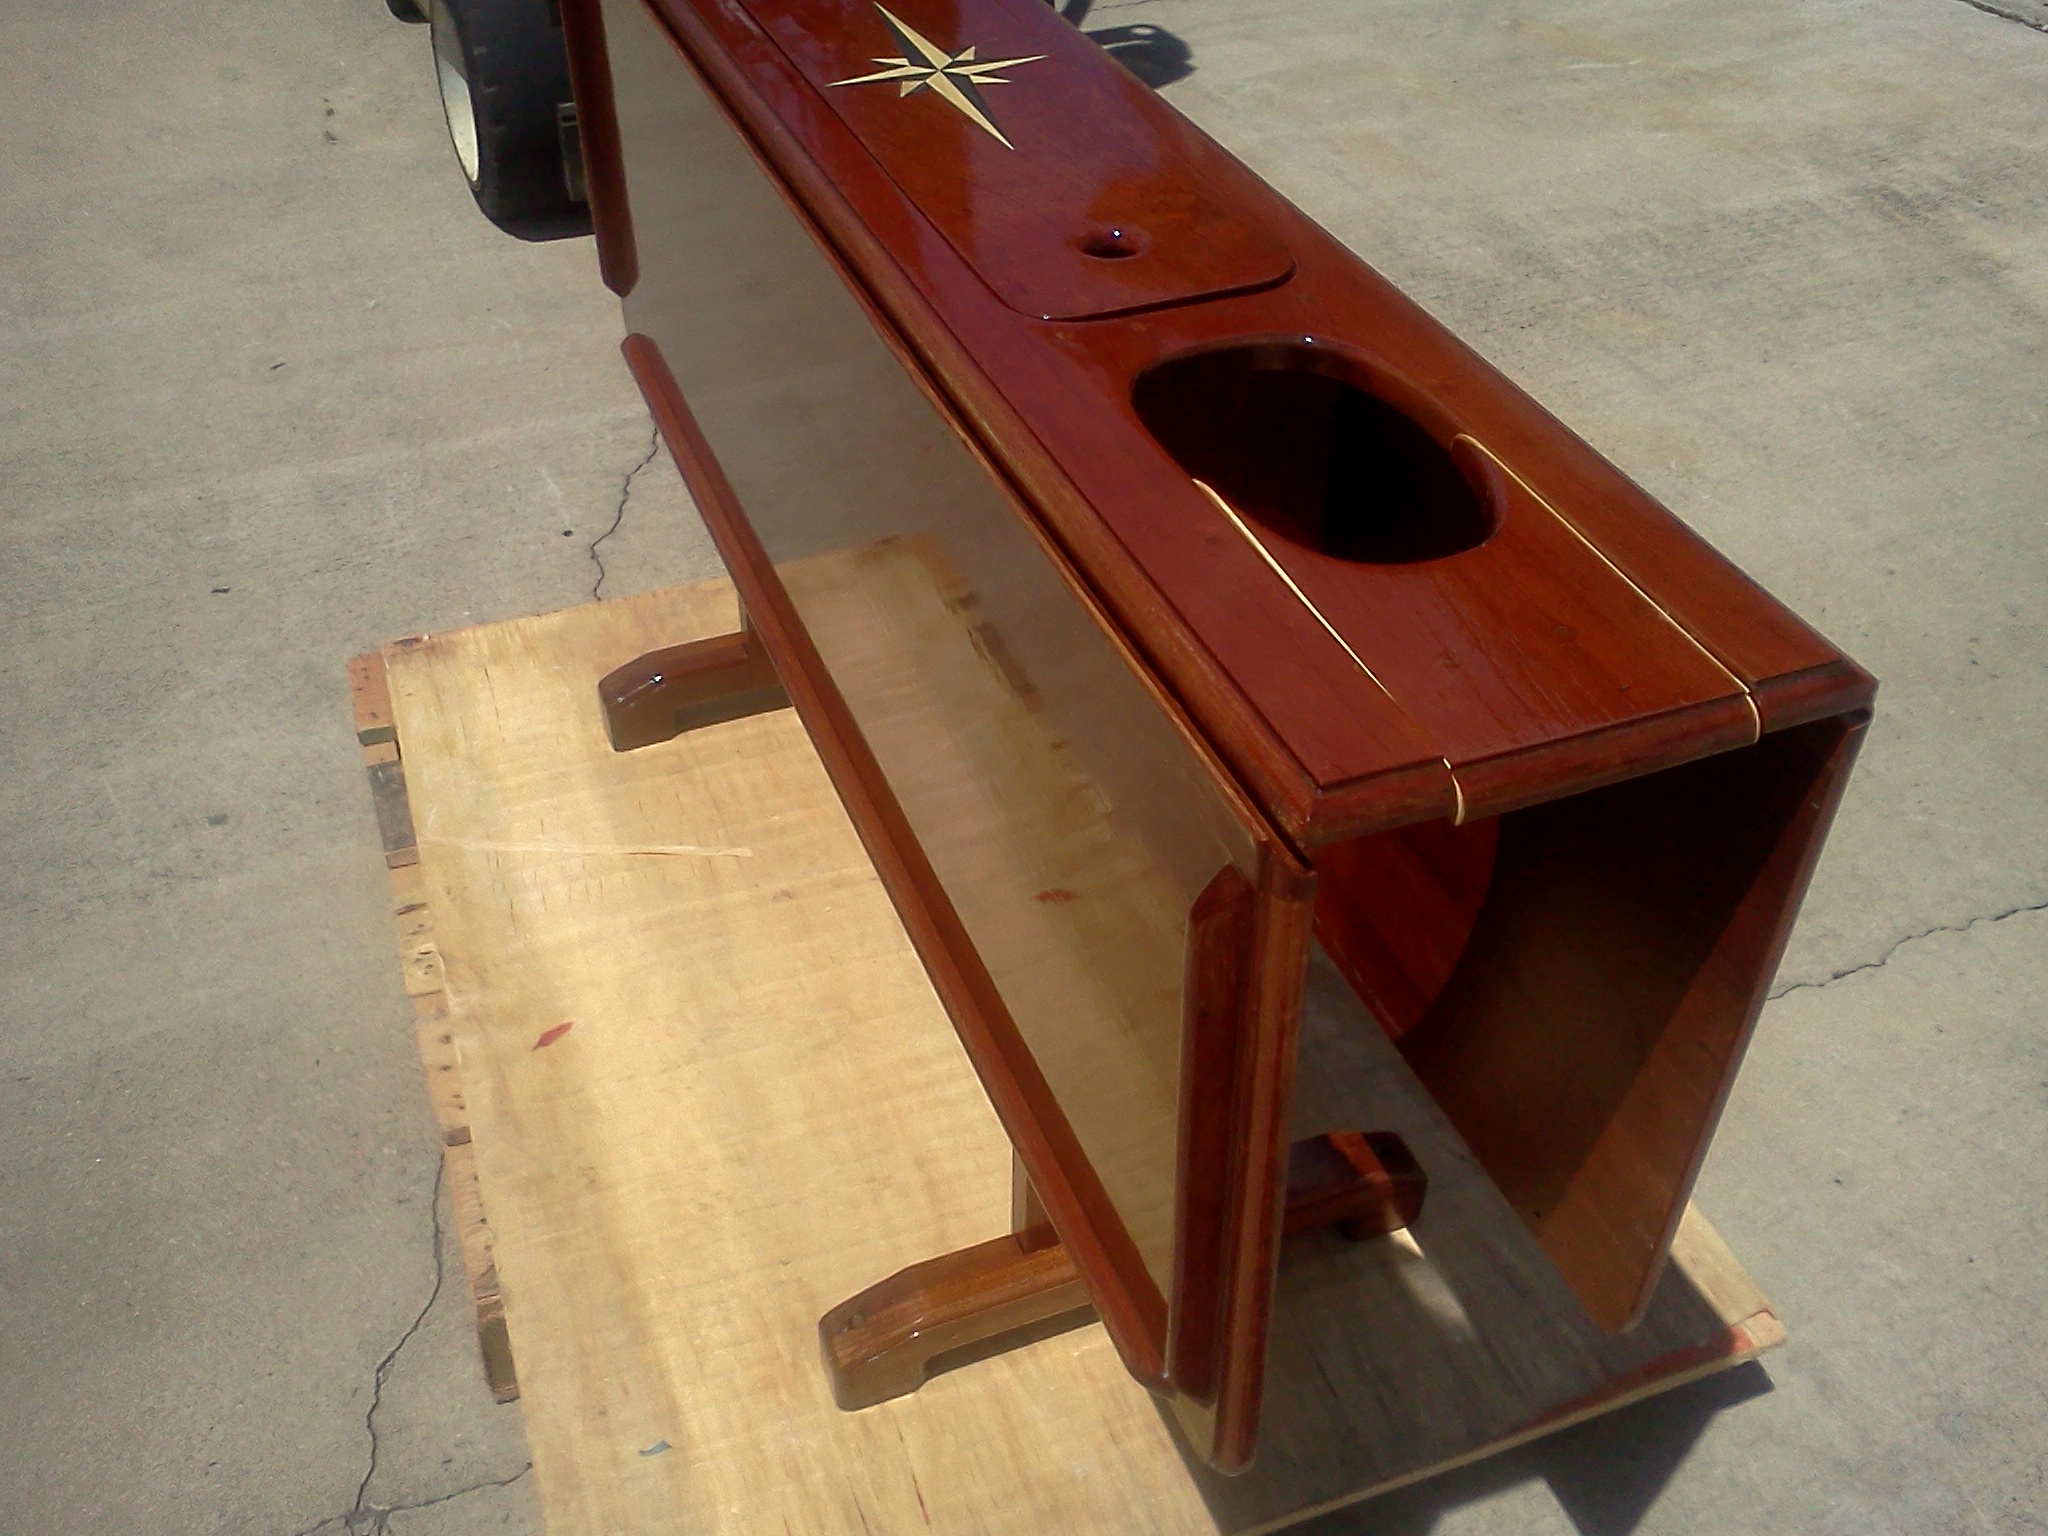
Since I could only work indoors, I decided to drag out the salon table and get it ready to go back in the boat. I had taken the leaves out and repositioned the forward leg inside of the table so that it could be installed after the mast is in. At present, the mast goes through the table top and you must decide when you step the mast weather you want it or not. I still have to cut the top off, but I decided to make a new center section. The original table has a 5" deep storage area and I could improve on that. I decided I needed a safe place to store some bottles. I needed at least 13" in depth as most quart bottles are 12" tall. I stopped by the store on my way to work and purchased a couple of bottles of vermouth and Campari as I was out at home. I told my wife it was for research purposes. Anyway, made a box out of cabinet grade 1/2 birch plywood and stained it as dark as birch would go. It is pretty close to the teak. Sonoma red was the Minwax color. You cannot see the storage box with the table leaves down. Only with the leaves up, you can if you crawl under it. I had some sole plywood left over and made a cover for the bottom of the box. It looks better than just plain wood in there.


May 17 - 24, 2013
Still working on the salon table. Last week I had 1 coat of sealer and 1 coat of varnish with 2 sandings. Our sealer is a mixture of 50/50 varnish and thinner. We call it the Frankenstein bucket. It contains all the left over varnish from jobs were some 5 gallon buckets had some varnish left but not enough to use on that job. Rather than throw it away, it goes into this bucket that will be used in house for sealer coats. . It is used to seal the wood pores and raise the grain. Most of it is sanded off and serves as a good base coat to start building the varnish layers.
It,s looking good but not quite there yet. The teak started to show some grain dishing and the table top was not smooth. A third aggressive sanding with a hard plate Bosch sander got most of the ridges off and gave me a great flat surface to start laying the good stuff.
I used my top premium court varnish. This is the stuff we use when refinishing NBA courts and some of the top Colleges and Universities basketball courts. Usually, High Schools get the cheaper stuff. This Bona Sport Court has the most solids and the highest gloss of all the varnishes we use, water borne or oil modified, bar none.


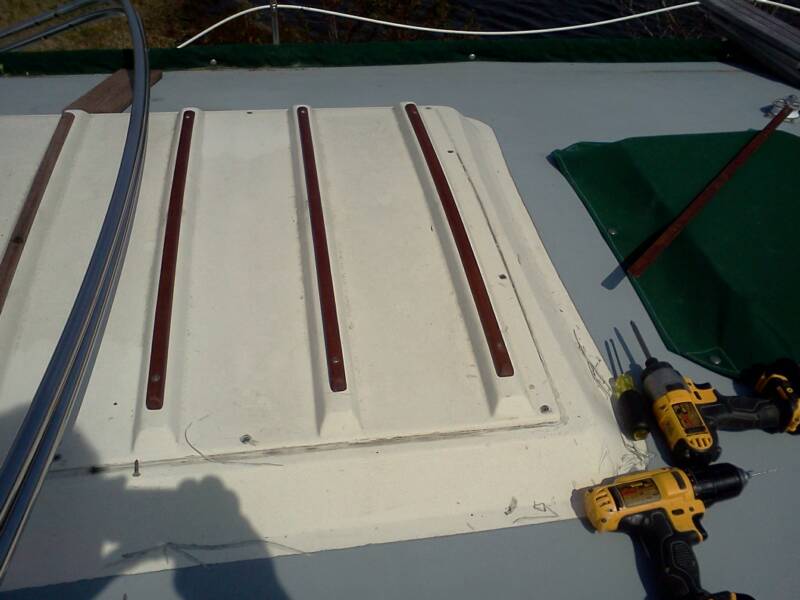
Third item on the list was to install the battens I had made to go over the spray hood. I noticed that some 1982 to 1984 models had this item. Some of us hate teak maintenance but this boat has so little that after laying a batten over the hood rib, I liked the way it dressed it up so I made 5 more to cover all the ribs. After sanding, and staining the wood, I installed them with polysulfide caulk on the screw holes. I think they will not be much trouble to clean and they dress up the house a little bit.
Next, I dug out all the white silicone caulk that bedded the spray hood to the deck. It was black with mildew. I had used the best GE silicone and it said mold resistant on the tube. I have ordered a tube of 3M 4200 as I don't want to use the 5200. I may have to re open this item in the future and the 5200 would make it permanent. ;-)
I have yet to see mold on the 3M 4200 or 5200 products. I used the 4200 on all my ports when I re installed them 2 years ago and no mold on caulk yet.
Time for clean up and a well deserved cold adult beverage. Making a list for next week end chores. It is suppose to rain, but temperature in the high 60's.
Cheers
My music of the week
Budapest Blues by Ivan Kopas. Like his music a lot
My music of the week
Budapest Blues by Ivan Kopas. Like his music a lot